Tuesday, January 4, 2011

Lamb Tongue Confit


My curiosity tends to get the best of me when I see strange cuts of meat at the butcher.  I may be in line to buy pork chops, but if I see duck hearts behind the glass, all thoughts of pork go out the window. God help me the day I spot a bull penis.

The other day, I went to one of my favorite butcher's, Dickson's Farmstand Meats, to pick up some pretty standard fare: lamb chops, bacon, and pork shoulder.  As I was picking out my lamb chops, I noticed a small pile of what looked exactly I imagined a lamb tongue would look like.  Sure enough, the butcher confirmed that the ugly things that looked just like tongues, were indeed tongues.  I never imagined that one could even eat a lamb's tongue, so after seeing them, I had to buy them.  I purchased all seven of the tongues, which I assume must be exactly how many lambs the shop had butchered in the past few days because who else in their right mind would purchase the things?


Being from Dickson's, the lamb tongues I purchased were from local, sustainably raised lambs, which I'm going to assume hope means that my tongues had only touched wholesome things (one can only imagine what Lindsay Lohan's tongue must taste like...eek).  In other words, I had to do these tongues justice.  My first thought was to braise them which is usually the method I choose when I have no clue how else to cook something, but I wanted do something that was less familiar.  After doing some research, I found that confiting was a popular method of cooking lamb tongues.


This marked my first time confiting anything, but the method is pretty standard no matter what meat you choose to confit.  The first step is to cure the meat in a mixture of salt and herbs.  I purchased about a pound of lamb tongues and used one-and-one-third teaspoons of salt, a minced shallot, a minced garlic clove, a teaspoon of black pepper, and a teaspoon of herbs de Provence.  So long as you keep the meat to salt ratio the same, you can experiment with any combination of seasonings.  I rubbed this mixture all of the lamb tongues, covered them, and placed them in the refrigerator overnight to soak in all the good flavors.


The next day, I removed the tongues from the refrigerator, rinsed off the seasonings, and patted them dry.  I then place the tongues in a cast iron pot, covered them with olive oil, covered the pot, and placed them in a 225 degree oven.  I cooked the tongues until they were tender, which took about 3 hours.  I then let them cool enough so that I could handle them. 

Once cool enough to handle, I peeled the skin off of each tongue and cut off the core.  I have to admit that this part made me slightly squeamish as the tongues feel like...tongues.  Once I got over that, it was easy as the skin peels right away. Here is how they looked after removing the skins:


I then placed the tongues back into the oil, making sure that there was enough oil to cover them, and put them in the refrigerator for a later use.  They will keep for a couple of weeks.


Now that I have a container full of lamb tongue confit, I have a few ideas of how to use them.  In salads or over lentils or beans are my first thoughts, but what about you?  How would you serve lamb tongue confit?

Sunday, January 2, 2011

Lamb Chops with Artichokes, Olives and Capers

After having this blog for over two years, I've managed to cook a lot of foods that I otherwise might not have attempted if I did not have the blog to keep me searching for challenges.  Artichokes are one ingredient that I had not yet gotten myself to cook.  With their green pineapple-like appearance, they just look like they would be a lot of work to prepare.


While I like artichokes, I do not love them, and I assumed the effort they would take to cook would outweigh they satisfaction they would bring. However, it being New Year's Day yesterday, I was feeling particularly ambitious despite being slightly under the weather from the previous evening's debauchery.  I had purchased some lamb chops and wanted to do something interesting and festive with them.  I spotted a box of baby artichokes at the store and recalled a recipe in Thomas Keller's Ad Hoc at Home that paired lamb chops with artichokes.  Given my apprehensions about cooking artichokes in the first place, I'm not sure why I even considered a Thomas Keller preparation, which surely would be extremely nitpicky about trimming the vegetables just so and take twice as long as any other recipe; I'll blame my decision on the alcohol from the night before. 


To my surprise, even going by Chef Keller's precise directions, the preparing the artichokes was no more difficult than peeling a carrot (and a lot less dangerous!).  Trim off the stem.  Cut off the outer leaves at the base. Trim the top 1/2 inch of the artichoke, and then they are ready to cook.  It's exactly as easy as it sounds.  As for the lamb chops, well they went perfectly with the Mediterranean sauce of the artichokes, olives, capers, and tomatoes.  I can only hope that this dish bodes well for 2011.


Lamb Chops with Artichokes, Olives and Capers
Adapted from Ad Hoc at Home
Serves 2

Ingredients:
  • 6 baby artichokes, cleaned and trimmed as per the instructions above
  • juice of 1 lemon
  • salt and pepper
  • 4 lamb loin chops
  • 3 tbsp olive oil
  • 2 garlic cloves, crushed and skin left on
  • 4 thyme springs
  • 1/2 cup pitted kalamata olives
  • 1 tbsp capers, drained
  • 1/4 cup canned roasted tomatoes
Directions:
  1. Preheat the oven to 350F.
  2. Put the trimmed artichokes in medium bowl and cover with the water and lemon juice.  Stir the artichokes for a few seconds.
  3. Pour the artichokes and lemon water into a medium sauce pan.  If necessary, pour in additional water to cover.  Add a pinch of salt and place a damp kitchen towel on top of the artichokes to ensure that they remain completely submerged. Bring to a simmer over medium-high heat and cook until the artichokes are completely tender, 10 to 15 minutes.  Remove the artichokes to a medium bowl and add just enough of the cooking water to cover.  Set aside.
  4. Season the lamb chops on both sides with salt and pepper.
  5. Heat the olive oil in a large skillet over medium-high heat.
  6. Add the lamb chops and cook until well-browned on one side, 3 to 4 minutes.  Flip the lamb chops and cook the other side until well-browned, 2 to 3 minutes.  Add the garlic cloves and thyme to the pan.  Baste the chops occasionally with the fat in the pan.
  7. Place the skillet in the oven and cook until the lamb chops are cooked through, about 7 to 8 minutes for medium-rare.  Remove from the oven and allow the chops rest for 5 to 10 minutes. 
  8. While the lamb chops are in the oven, prepare the sauce.  Pour 1 tbsp olive oil in a medium sauce pan and heat over medium heat.  Add the artichokes and cook for about a minute.  Add the olives and capers and cook for another 30 seconds.  Add the tomatoes and cook for another 2 minutes.  Season the sauce to taste with salt and pepper.
  9. Serve the lamb chops immediately, topped with the artichoke sauce. 

Friday, December 31, 2010

So Long, 2010!


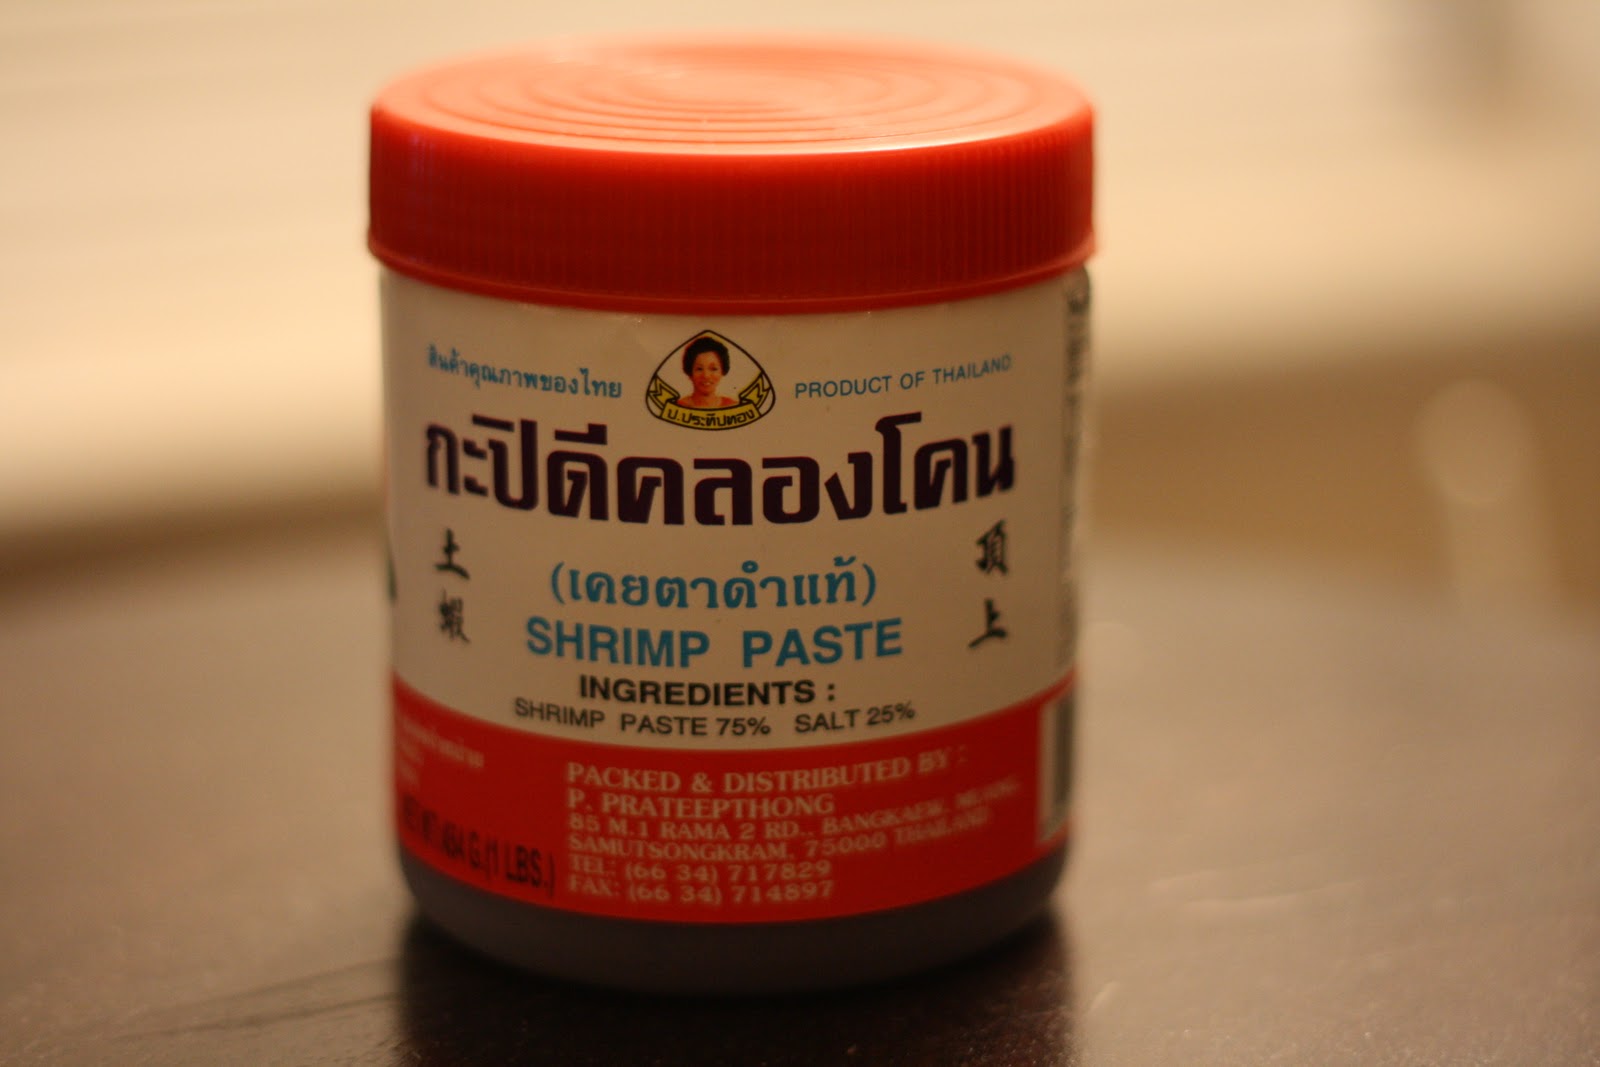
Looking back on 2010, I have to say that it’s been a pretty darn good year for me in terms of food.  I bookended the year with trips to the foodie paradise of San Francisco, first for New Year’s, then for the Foodbuzz Blogger Festival in November, and maintained a frenetic pace of cooking and eating in between.   Sure, I didn’t meet all the goals I had set for myself this year—that jar of squid ink still lingers in my fridge, now contending for space with a pesky jar of shrimp paste—but I am pretty darn satisfied with 2010 overall.  If there’s anyone who deserves my credit for making this such a good year for me food-wise, it is the people at Foobuzz, who provided two of the biggest highlights of my year in Foodbuzz Fest and Project Food Blog.  Both events exposed me to some incredibly talented and kind bloggers and showed me just how much fun I can have with this blog.  Oh yeah, and Project Food Blog got me to make a pretty mean batch of curry

So what’s in store for 2011, the third year (gasp!) of this blog’s existence?  Well, I’m going to push myself to make some big-time improvements.  You should see more frequent posts, more original recipes, and better photography on this blog.  All in all, I’m going to aim for every post on this blog to be Project Food Blog-worthy.  It will mean I have to spend a little more time in my kitchen and working on this blog, but it is a fun challenge that I can’t wait to begin. 

And with that, I am tipping my hat to 2010 and plunging into 2011! I wish you all a happy New Year!

Saturday, December 25, 2010

Merry Christmas!


Bugs and I wish you all a very Merry Christmas!

Thursday, December 23, 2010

Manicotti filled with a Little Something Something


One of my favorite meals growing up was my mother's manicotti.  I always assumed it just like all the other mom foods we love.  Crepes filled with ricotta cheese and topped with a little tomato sauce.  Easy, right?

I thought wrong.  After making these lamb-filled crepes this weekend, I now realize that I should have given my mom more credit for her manicotti.  Everything on down to the crepes was easy to prepare, but those pancakes sure were a doozy!  The technique sounded easy enough to me: a little butter in a non-stick pan, swirl the batter around, cook, flip, and cook a bit more.  But after several ugly, broken crepes and more batter over the Significant Eater's stovetop than she wants to know, I realized that I had to make some changes to my crepe technique.  I finally figured that the key to a good crepe is to keep it thin, stupid.  By putting just enough batter to cover the pan, the crepe will nearly cook through so that when you flip it, it will stay in tact.  Once I figure that out, I was a crepe-making machine, turning out a flawless crepe every few minutes.

Aside from the crepe part, this dish is the simple kind of component cooking I love.  It sounds intricate— braised meat, crepes, tomato sauce#151;but every component can be made well ahead of time.  Even better, you can turn this dish into anything you please by using the flavor profile of your choosing.  While I used braised lamb and flavored the ricotta with mint,  you could try braised pork shoulder and sage-flavored ricotta, or short ribs with rosemary ricotta.  Even crab and parsley ricotta with a pink sauce.  To that end, in order to keep you all on your creative tiptoes, I've made this recipe as ambiguous as possible. 


Manicotti filled with the Cook's Choice

Ingredients:

For the crepes:
  1. 2 cups whole milk
  2. 1 1/2 cups plus 2 tbsp flour
  3. 4 eggs, lightly beaten
  4. 4 tbsp butter, melted
  5. 1/2 tsp salt

For the ricotta filling:
  • 2 lbs braised meat of your choice, shredded with a fork
  • 1/4 cup herbs of your choice
  • 1/4 tsp red pepper flakes
  • 3 cloves garlic, minced
  • 2 cups good-quality fresh ricotta cheese
  • Tomato sauce of your choice, preferably homemade
  • Pecorino Romano cheese, grated
Directions:
  1. Mix the crepe ingredients together in a large bowl.  Strain and refrigerate overnight.
  2. Mix together the ingredients for the crepe filling.
  3. Heat the tomato sauce.
  4. Preheat the oven to 375F.
  5. To make the crepes, heat a medium-size nonstick pan over medium heat and brush it with melted butter.  Ladle a quarter cup of the crepe batter into the pan and swirl the batter around so that the bottom of the pan is entirely coated (you want the crepe to be very thin).  Let the crepe cook for 1 to 2 minute until it is nearly cooked through.  Carefully flip the crepe and cook the other side for another minute.  Remove the crepe to a plate.  Repeat this technique with the rest of the batter, stacking the crepes on a plate.  This should make approximately 15 to 20 crepes.
  6. To make the manicotti, fill the center of each crepe with about 1/3 cup of the ricotta filling.  Wrap each crepe and place seam-side down in a greased casserole dish.  
  7. Place the casserole dish in the oven and cook until the sides of the manicotti begin to brown, 7 to 10 minutes.
  8. Top the manicotti with the heated tomato sauce and grated Pecorino Romano cheese and serve immediately.


Tuesday, December 14, 2010

Ground Pork with Shrimp Paste and Lemongrass


I'll be the first to admit that shrimp paste isn't for the squeamish.  Pungent—and not in a good way—and pasty, for lack of a better word, the ingredient made of ground fermented shrimp might scare away even the most adventurous foodies.  However, as any lover of Southeast Asian cuisine is aware, shrimp paste makes pretty much everything taste better.  Just take Thai curry or papaya salad: yup, you guessed it, shrimp paste is an active player in their deliciousness.  As much as I try, I can't quite live off of curry and papaya salad, so I'm always looking for new ways to use up some of the jar of shrimp paste in my fridge. This pork recipe, loosely adapted from Andrea Nguyen's Into the Vietnamese Kitchen, was one of those attempts.  Typical of most Southeast Asian dishes, this one plays off of a contrast of flavors, with sweet, salty, and spicy well represented.  I still have half a jar of shrimp paste left, but I suspect I'll be purchasing more in no time.


Ground Pork with Shrimp Paste and Lemongrass
Serves 4

Ingredients:
3 tbsp peanut oil
3 dried Thai chiles
4 cloves garlic, minced
3 lemongrass stalks, trimmed, cut in thirds, and pounded with the flat side of a knife
1/2 pound ground pork
12 shrimp, peeled, deveined, and minced
1 tbsp sugar
2 tbsp shrimp paste, diluted in 1/4 cup warm water
1 tsp sesame seeds
2 Kirby cucumbers, thinly sliced

Directions:
Heat the oil in a large skillet over medium-high heat.
Add the chiles to the skillet and cook, stirring occasionally until they are fragrant and blackened.
Add the garlic and lemongrass to the skillet and cook until the garlic is fragrant, about 1 minute.
Add the pork to the skillet.  Use the back of a wooden spoon to break the pork up as it cooks, and cook until the meat is no longer pink, about 3 minutes.
Stir in the shrimp, sugar, and shrimp paste and cook for about ten minutes, stirring occasionally, until the mixture caramelizes, turning a reddish brown.  If the pan dries out, add a tablespoon of water at a time.
Remove the mixture from the pan and serve immediately with rice, topped with sesame seeds and garnished with the cucumbers.

Sunday, December 12, 2010

FIJI Water Holiday Cookie Swap and Bake Off to Benefit the Lower Eastside Girls Club


 This Saturday, December 18, I will be baking a batch of cookies for the FIJI Water Holiday Cookie Swap and Bake Off, a cookie sale to benefit the Lower Eastside Girls Club.  If you live in New York City, I urge you to attend and support a great cause while filling up on a plethora of cookies.  The event will be held from 1pm to 4pm at Vie Vie (East 1st St. between First and Second Avenues).  Tickets can be purchased here for $15.  As for what I will be baking: I am still deciding, but I did make a test batch of Dorie Greenspan's Chocolate Whopper Cookies this weekend, and I think they will be tough to beat. 

LinkWithin

Related Posts with Thumbnails