The best braises utilize tough, sinewy cuts of meat, preferably on the bone to bring out the best flavor. Lamb shanks, pork butt, and short ribs are some of my favorite braising cuts. In this case, I used two meaty pork shanks.
The first step is to brown the meat. Heat a small amount of oil (remember, most braising cuts already have a good bit of fat on them) over high heat in a Dutch oven or other braising dish. Then season the meat well with salt and pepper and toss it in the pan. You want to cook it until it is well browned on all sides, then set it aside on a plate.
Next up are the aromatics. Celery, onions, and carrots (the "Holy Trinity" of cooking) are the typical aromatics, but you can use any number of chopped root vegetables. I like to use fennel in addition to the standards. Adding some extra fat to the pan if necessary, you want to cook the aromatics over medium heat until they are soft and beginning to brown.
Once the aromatics have cooked, you can add some seasonings. A bay leaf, thyme, and rosemary are some of my favorite seasonings for a basic braise, but you can use any mix of spices and herbs. Once you add the seasonings, you'll want to deglaze the pan with a big splash of dry white wine or vermouth. Let the wine come to a boil and be sure to scrape the bottom of the pan with the bag of a wooden spoon so that you dislodge the brown bits of meat that may be stuck to the bottom of the pan, which add lots of flavor to the braise. Let the wine boil away until the pan is almost dry.
Now, you'll want to add the meat back to the pan. Then add enough stock to come up to about a third of the way up the meat. It's best to match the stock to the meat you are using (i.e. lamb stock for lamb, beef stock for beef, etc.), but as a general rule of thumb, use heavier stocks for heavier meats and lighter stocks for lighter meats. I added far too much stock in the photo; you really want it to come only a third of the way up the meat.
Now you're ready to braise. I prefer to braise in the oven, where I can depend on a constant temperature, but you can also braise on the stove top. The key is to cover the pan tightly and braise at very low heat; you want the liquid to be at a very slow simmer. Every 45 minutes or so, it's a good idea to flip the meat and re-cover the pot. You'll want to braise the meat until it is falling off the bone, so check on it every time you flip it.
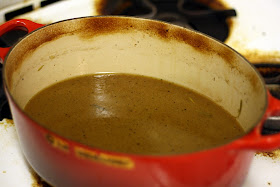
Once the meat is done, you can set it aside on a plate while you finish the sauce. If you want a more refined sauce, you can strain the braising liquid and remove the aromatics as I have done. For a more rustic sauce, you can leave the aromatics in the liquid. The important thing is that you taste the liquid to ensure that it is well-seasoned and of a good consistency. If it needs to be thicker, boil it for a few minutes and add salt and pepper to taste.
Now you're ready to serve the braise. Put the meat in a serving dish, pour over some of the braising liquid, and serve the it all alongside a starchy side like mashed potatoes, polenta, or beans that will soak up all of the delicious liquid.
Wasn't that easy?


No comments:
Post a Comment