Showing posts with label A16: Food and Wine. Show all posts

Sunday, December 27, 2009

Short Ribs alla Genovese


These short ribs from A16: Food + Wine embody much of what this blog is all about: making the most of just a little bit. In this case, that little bit is ingredients, of which this recipe contains only a handful, and almost all of which are probably already in your kitchen. The recipe truly does make the most of these ingredients, for the braising liquid is as robust as any. Two days after the short ribs were long gone, I used the leftover braising liquid, which is chock-full of sauteed red onion, and made a meal of the liquid poured over freshly cooked polenta, once again making the most of just a few ingredients.

Short Ribs alla Genovese
Adapted from A16: Food + Wine

Ingredients:

  • 4 meaty, bone-in short ribs
  • Kosher salt
  • 4 tbsp olive oil
  • 1 1/2 cups dry red wine
  • 1 small carrot, peeled diced
  • 1 celery stalk, trimmed and diced
  • 5 anchovy fillets, minced
  • 2 cloves garlic, peeled and crushed
  • 5 black peppercorns
  • 3 red onions, thinly sliced
  • 3 tbsp red wine vinegar
  • 1 sprig rosemary

Directions:

  1. At least an hour prior to cooking, remove the short ribs from the refrigerator. Trim any excess fat from the ribs and season them well with salt.
  2. Preheat the oven to 275F.
  3. In a small saucepan, boil the wine until reduced to 1/2 cup. Set aside.
  4. Heat 2 tbsp olive oil in a large Dutch oven over medium-high heat. Add the ribs to the Dutch oven and cook until well-browned on all sides, 8 to 10 minutes. Do not crowd the ribs; if necessary, cook them in two batches.
  5. Remove the ribs from the pan and set aside on a plate. Pour out the fat from the pan and wipe out any burnt bits from the pan with a paper towel.
  6. Add the remaining 2 tbsp of olive oil to the Dutch oven and heat over medium heat. Add the carrot and celery and cook until they are soft and beginning to brown, about 5 minutes, adjusting the heat of the pan as necessary.
  7. Stir in the anchovy, garlic, and peppercorns and continue and cook for 3 minutes, stirring occasionally.
  8. Add the onions and a pinch of salt to the pan and cook until the onions are soft and translucent, 5 to 10 minutes.
  9. Stir in the reduced red wine and the vinegar with the vegetables and remove the pan from the heat.
  10. Add the short ribs to the pan, nestling them into the vegetables meat side facing down. Wedge the rosemary sprig between the short ribs.
  11. Cover the Dutch oven and place it in the 275F oven. Cook until the short ribs are tender and falling off the bone, approximately 2 1/2 hours. Serve the ribs over polenta topped with the braising liquid.

Monday, July 13, 2009

Spaghetti with Fava Beans and Pancetta

Pasta with fava beans is a traditional spring-time dish in Southern Italy. Locally grown fava beans may not be available in New York until summer, but it's still perfect dish for warm weather no matter the time of year. The fava beans add a refreshing sweetness, while the pancetta makes this light dish just hearty enough. I adapted the recipe from A16: Food + Wine; follow along to my photographed directions:

First, set your mise en place (red onion, pancetta, red pepper flakes, blanched and peeled fava beans, spaghetti, pecorino, black pepper, olive oil):


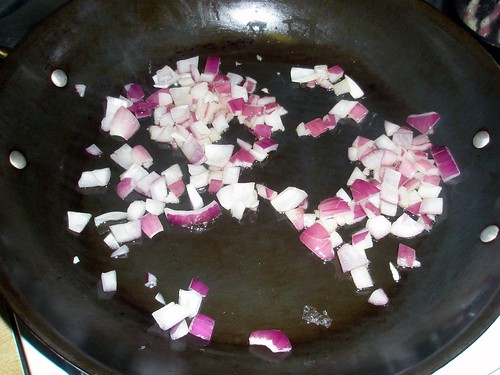
Next, saute the red onion in olive oil over medium heat:


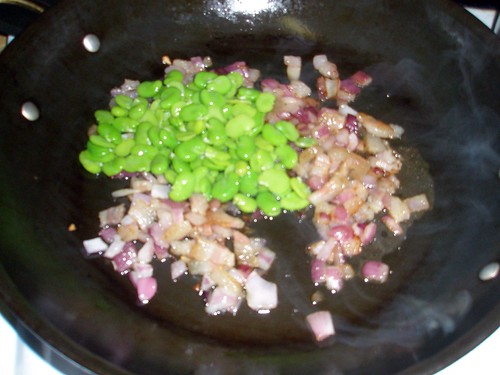
Add the pancetta to the pan and was cook until it begins to get crispy:

Lower the heat to low, toss in the fava beans, pepper, and a ladle of pasta cooking water:


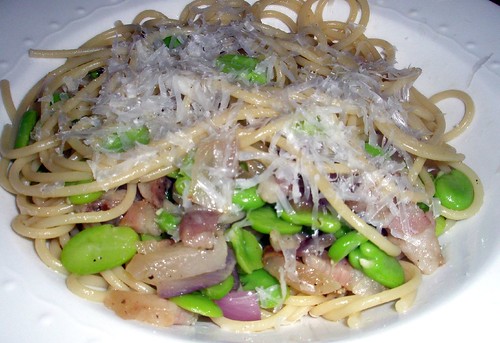
Toss the everything together with the pasta, add some olive oil, and top with grated pecorino cheese and serve:

Thursday, April 23, 2009

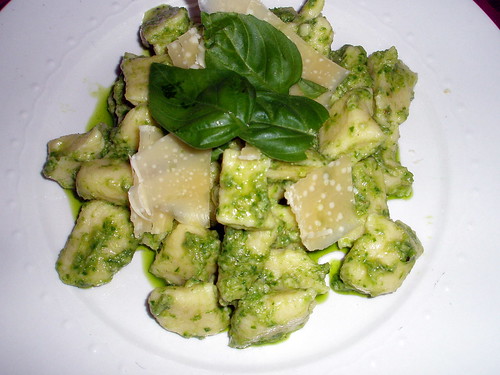
Ricotta Gnocchi with Ramp Pesto

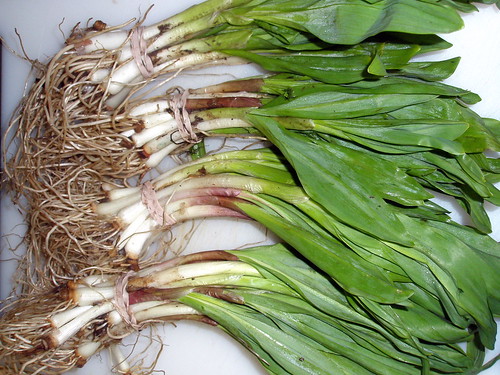
This could hardly be called a New York-based food blog I didn't feature at least one recipe with ramps. Ramps are wild leeks that have a very short growing season and are all the rage in the East Coast culinary world at the beginning of spring. The bulbs and stems are as pungent and garlic, while the leaves have a grassy flavor. This combination makes ramps versatile ingredients, able to brighten dishes ranging from pasta to eggs.


I used my first ramps of the season to make a ramp pesto, which I served with ricotta gnocchi I had made from the A16: Food+Wine cookbook. This was my first ever attempt at pasta, and I was pleased with the result. While not nearly as light and fluffy as great gnocchi can be (mostly due to my lack of a stand mixer and the addition of too much flour), the flavor was very nice. More importantly, the gnocchi held together when I boiled them, making them a success in my book.

Although I cooked the ramp bulbs and stems prior to processing them for the pesto, it was still incredibly pungent and peppery. The flavors overwhelmed the gnocchi, so I would recommend just pairing it with a simple dried pasta such as rigatoni. I would think the pesto would also be great with any roasted or grilled meat. Just be sure to brush your teeth thoroughly after trying this pesto, as your breath will be potent.


Ramp Pesto

Ingredients:
  • 3 to 4 bunches of ramps, washed and thoroughly dried
  • 1 tbsp plus 3/4 to 1 cup of olive oil
  • Salt, to taste
  • 2 tbsp walnuts
  • 1/2 cup parmesan cheese
Directions:
  1. Separate the ramp stems and bulbs from the leaves. Chop the stems and bulbs into small pieces. Set aside and reserve the leaves.
  2. Heat 1 tbsp oil in a small skillet over medium heat. Add the chopped ramp stems and bulbs and cook, stirring occassionally, for about 5 minutes (do not brown).
  3. Add the ramp leaves, bulbs and stems, salt, walnuts, and 1/2 cup of oil to the bowl of a food processor. Process until a paste is formed, then drizzle in the rest of the olive oil while continuing to process the mixture. Continue to add more oil until pesto reaches a desired consistency. Taste for salt.
  4. Fold in the parmesan cheese and serve.

Thursday, March 5, 2009

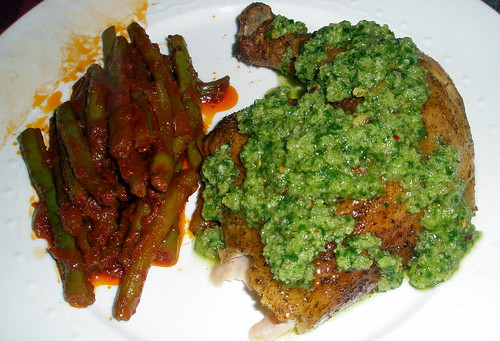
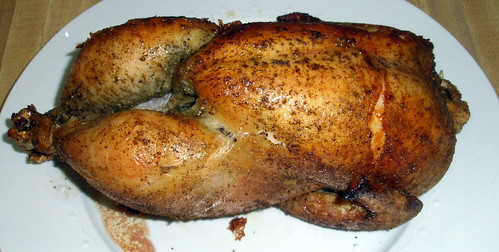
Roasted Chicken with Salsa Verde from A16: Food + Wine

To me, a new cookbook is like a new toy to child; shortly after buying one, I just can't stop playing with it. In the case of A16: Food + Wine, I have a new toy that I don't think I will ever grow bored of. I've already sung my praises for this cookbook, but I would like to report on yet another excellent dish that I cooked from it: Roasted Chicken with Salsa Verde.

The recipe is actually for tiny roasted young chickens, but I had picked up a nice 3lb. Giannone chicken, so used that instead. I also ran out of dried oregano so I substituted dried sage for some of the oregano that the recipe called for. The chicken still turned out beautifully: a wonderfully crispy skin, juicy and flavorful meat. The salsa verde is excellent as well; my girlfriend who abhors parsely gave it her approval, so don't be alarmed by the cup of parsley that goes into the sauce.

There are two keys to this dish. First, spend a little extra to get a quality bird; chicken quality makes an especially big difference when it comes to simply roasted chicken. Second, the chicken benefits greatly from the two day seasoning process. Planning a recipe two days in advance can be a hassle, but after two days, the seasoning permeates the meat nicely. As an added bonus, this process allows you to just toss the chicken in the oven when you are ready to cook it rather than taking the time to wash, dry, and season the chicken first.


Roasted Chicken with Salsa Verde


For the Chicken:
  • 1 good-quality 3lb. chicken, washed and thoroughly dried
  • 3 Tb kosher salt (yes, 3; don't be shy)
  • 1 1/2 Tb dried oregano
  • 1 1/2 Tb dried sage
  • 1/2 ts dried chile flakes

For the Salsa Verde:
  • 1cup flat leaf parsley
  • 1/2 ts dried chile flakes
  • 1/2 ts capers, drained
  • 1/2 cup fresh breadcrumbs
  • 1/2 cup extra virgin olive oil
  • 1/2 of a lemon
  • small clove of garlic (or 1/2 of a large clove)
  • pinch of salt

Directions:
  1. Two days prior to cooking, grind oregano, sage, and chile flakes in a spice grinder. Rub chicken skin and cavity with salt. Then, rub spice mixture on skin and in cavity. Cover and refrigerate for two days.
  2. Cook chicken at 450F until cooked through, about 50 minutes. Meanwhile, make the salsa verde.
  3. For salsa verde, add parsley, breadcrumbs, chile flakes, capers, and garlic to food processor. Pulse until well blended. While running processor, drizzle in olive oil. Add lemon juice and pinch of salt and process to blend.
  4. Once chicken is cooked, let it rest for 10 min. Serve with salsa verde.


Sunday, March 1, 2009

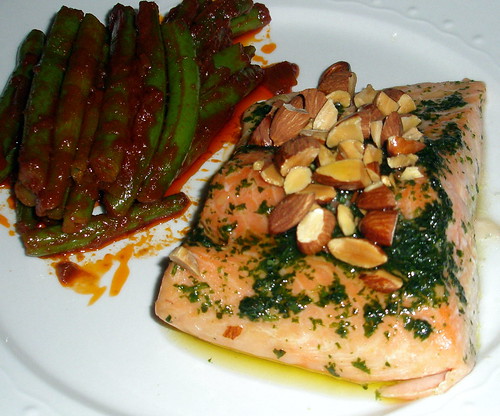
Braised Arctic Char with Basil, Almonds, and Lemon

Recently, I have been obsessed with the cookbook A16: Food and Wine by Nate Appleman and Shelley Lindgren. This cookbook showcases beautiful photography, an very informative section on the wines of southern Italy, and most importantly, an amazing selection of southern Italian-inspired recipes. So far, I have made the Ragu Alla Napoletana, Braised Halibut, with Pistachios, Preserved Meyer Lemon, and Capers, and Braised Kale with Tomato and Anchovy Soffrito. All have been excellent. I am looking forward to giving the pizzas, ricotta gnocchi, and meatballs a try; each of these recipes will be upcoming weekend projects. Tonight, I kept it simple; adapting two recipes from the cookbook to serve braised arctic char with basil, almonds, and lemon along with a side of green beans braised in the tomato and anchovy soffrito leftover from last weekend's kale. While the fish was my least favorite of the recipes I have tried from the book, it was still tasty and quite easy to prepare.


Braised Arctic Char with Basil Almonds, and Lemon
Serves Two

Ingredients
  • two six 0z. arctic char filets
  • kosher salt
  • 1 cup packed basil leaves
  • 1/4 cup olive oil, plus more for drizzling
  • handful of almonds, toasted and coarsely chopped
  • 2 lemon wedges
Directions
  1. Salt arctic char 1 hr. prior to cooking and bring to room temperature
  2. Preheat oven to 400F
  3. In a food processor, pulse basil until it forms a paste
  4. Drizzle in olive oil to food processor and process until basil and oil form a smooth paste
  5. Add a tiny pinch of salt to basil mixture
  6. Place filets in skillet large enough to comforatbly hold both filets
  7. Spoon basil mixture on top of both filets
  8. Add water to skillet to come half way up filets
  9. Place skillet in oven. Bake about 10 minutes or until fish can be flaked with a fork.
  10. Plate filets. Top with chopped almonds and a drizzle of olive oil. Serve with lemon wedges.

LinkWithin

Related Posts with Thumbnails