Showing posts with label chicken. Show all posts

Sunday, September 26, 2010

Project Food Blog Challenge #2: The Classics

Many thanks to those who voted for my post for Challenge #1 of Foodbuzz's Project Food Blog!  Your votes got me to Challenge #2, "The Classics." The prompt for the second challenge reads:

How well can you tackle a classic dish from another culture? We're bypassing the French and Italian standards in favor of more challenging cuisines.

The competition for this challenge will be even tougher, so it's all the more important that everyone vote for their favorite posts.  Voting will commence at 9am EST on September 27.  You can vote for this post via my contestant profile.  Thanks in advance for your votes!

For the second challenge, I decided to make a traditional Thai red curry, not only because of the challenge the dish would present, but also because I had at least one major doubter in my ability to pull it off.  Those of you who regularly follow this blog are probably aware that the Significant Eater is of Laotian heritage.  Although she loves and reaps the benefits of much of my cooking, she is skeptical any time I try to cook the Southeast Asian cuisine that she grew up eating.  Although I have been successful in past efforts--Significant Eater had been particularly impressed with the authenticity of my larb--, pounding out a curry paste from scratch and making a great curry would at last calm her fears of seeing me in the kitchen with fish sauce and shrimp paste in hand.


My mission began in Chinatown at Bangkok Center Grocery, the best place in Manhattan to purchase Thai ingredients.  The friendly store clerk, who no doubt had the same misgivings as the Significant Eater when I told him I was making red curry, helped me find many of the ingredients that I would need to prepare the dish: galangal, lemongrass, coriander seed, white Kaffir limes and lime leaves, shrimp paste, bird's eye chilies, Thai basil, palm sugar, and coconut milk.  Unfortunately, the store had sold out of fresh coriander root, so I decided to double the amount of coriander seeds in the recipe and hope for the best (thankfully, it worked out).

 Most importantly, I also purchased a beautiful granite mortar and pestle that would help me pound out a perfectly textured curry paste. I picked up the vegetables I would need for the curry, long beans and Asian eggplant, from another Chinatown grocer, and was on my way home to start cooking.
 

The most challenging part of making a curry is preparing the curry paste.  Although it can be easily blended in a food processor, using a mortar and pestle will give the curry paste a better texture, and is also a much more Project Food Blog-worthy method.

The first step is to toast the spices (coriander, white peppercorns, and cumin seeds) in a dry skillet.  I toasted them until they were fragrant and beginning to crackle.  Once toasted, I tossed them into the mortar and pestle and began pounding away.


The Significant Eater chided me for my apparently weak mortar and pestle skills, letting me know that her 90-year-old grandmother not only makes curry paste faster than I, but also does so using a pestle that is twice as large as mine.  Once I got over my pestle envy, I rolled up my sleeves and began pounding away at the spices with more aggression.


Once the spices were ground to a fine powder, I set them aside and placed the shallots, garlic, soaked dry chilies, salt, galangal, lemongrass, and Kaffir lime rind in the mortar and once again began pounding them with the pestle.  To say this step was labor-intensive is an understatement; it took over fifteen minutes, with a few breaks in between, before I was able to pound out all of the chunks in the paste. 


Finally, I added the ground spices and the extremely pungent shrimp paste to the mortar and mixed the paste together.  With a sore arm, I had finally completed the curry paste.  One thing is for sure: if I make curry paste a few times a week, I will no longer need to pay for a gym membership. 

And another thing that's for sure is that curry paste sure ain't the prettiest.


Fortunately, once I had prepared the curry paste, the rest of the curry was fairly easy to make.  First, I fried some of the paste in a bit of peanut oil until it was fragrant.  Then, I tossed in the chicken and stir fried it until it was cooked through.  Once done, I added in about half a can of coconut milk along with the long beans and chopped Kaffir lime leaves, and let it all simmer away for several minutes.  I then added the fish sauce, palm sugar, and eggplant and kept everything simmering until the eggplant was soft.  Finally, I tossed in the Thai basil.  The curry was ready!


I was a bit concerned that the curry was not as red in color as I expected it to be, but it certainly smelled and tasted like a Thai curry.  Of course, the only opinion that mattered was that of the Significant Eater herself.  I watched her with great trepidation as she spooned a small amount of the curry onto her plate and took her first bite.  Silently, she then proceeded to scoop out several more spoonfuls onto her plate.  Finally, she exclaimed, "Perfect!"

I have a feeling that she'll be allowing me to cook with my fish sauce and shrimp paste more frequently from now on.


Red Curry Chicken ("gang phet" in Lao)
Serves 4

For the curry paste:
  • 1 tsp cumin seed
  • 1 tbsp coriander seed (use another teaspoon if not using coriander root)
  • 1 tsp white peppercorns
  • 5 dried Thai chilies, seeded and soaked in warm water
  • 1 tsp salt
  • 5 small shallots, thinly sliced
  • 10 garlic cloves, peeled
  • 1 tsp galangal, thinly sliced
  • 1 tbsp lemongrass, thinly sliced
  • 1 tbsp Kaffir lime rind, thinly sliced (discard the green peel and use the white pith)
  • 2 tsp coriander root, finely chopped
  • 1 tsp shrimp paste 
  1. Toast the cumin, coriander seeds, and peppercorns in a dry skillet over medium heat until they are fragrant and begin to pop.  Place them in a mortar and pound them with a pestle until they are finely ground.  Remove the spices from the mortar and set them aside.
  2. Add the dried chilies and salt to the mortar.  Pound the chilies to a paste.
  3. Add the shallots, garlic, galangal, lemongrass, lime rind, and coriander root to the mortar.  Pound the ingredients with the pestle until they form a paste.  
  4. Return the ground spice to the mortar along with the shrimp paste and use the pestle to mix the paste together. 
  5. Set three tablespoons of the curry paste aside for the curry.  The remaining paste can be frozen for up to 6 months. 
For the curry:
  • 2 tbsp peanut oil
  • 3 tbsp curry paste
  • 1 lb. boneless, skinless chicken thighs, cut into bite-size pieces
  • 1 1/2 cups Chinese long beans, chopped into 1-inch pieces
  • 1/2 of a 13.5 oz. can of coconut milk
  • 1 1/2 tsp palm sugar
  • 2 tbsp fish sauce
  • 1 Asian eggplant, sliced into half-moon-shaped pieces
  • 2 fresh Thai chilies, thinly sliced
  • 1/2 cup fresh Thai basil leaves
  1. Heat the peanut oil in a large saute pan with high sides over medium-high heat. 
  2. Add the curry paste to the pan and cook, stirring constantly, until the paste is extremely fragrant, 3 to 5 minutes.
  3. Add the chicken to the pan and increase the heat to high.  Cook, stirring constantly, until the chicken is nearly cooked through, 3 to 5 minutes.  
  4. Reduce the heat to medium and add the coconut milk, long beans, and lime leaves to the pan.  Bring the coconut milk to a simmer, stirring frequently, until it thickens slightly, about 5 minutes.  
  5. Add the palm sugar, fish sauce, chilies, and eggplant to the pan.  Continue to simmer the curry until the eggplant is cooked through, about about 3 minutes.
  6. Taste the curry for seasoning.  If it needs salt, add a small amount of fish sauce.  If it is not sweet enough, add a small amount of palm sugar.  If it is not hot enough, add additional chilies.  
  7. Add the basil leaves to the curry and serve it with steamed Jasmine rice. 

Monday, September 6, 2010

Chicken Breasts wrapped in Pancetta and Sage


I rarely cook chicken breast dishes, especially those that do not contain a flavorful sauce to drown out the blandness of the lean breast.  Despite my misgivings about the the sound of it--sauceless chicken breast wrapped covered with a few leaves of sage and several slices of pancetta-- I was impressed with how this dish turned out.  The pancetta provides the chicken with crunch exterior, and it's amazing how much flavor is packed into each sage leaf.  No need for a recipe here, just season each breast with salt and pepper, cover it with 6 sage leaves, wrap it in 3 slices of pancetta, and saute it in a small amount of olive oil until the chicken is cooked through, about ten minutes per side.  This techique would also work well with shrimp.

Tuesday, March 9, 2010

Coq au Vin


 Coq au vin is one of those classic dishes that I have wanted to add to my cooking repertoire for some time but have avoided out of fear that it would be a pain in the you know what to make.  I think I read about someone painstakingly peeling tiny pearl onions for coq au vin and it nearly put me off the dish for good; my fingers are not nearly nimble enough to easily peel pearl onions, nor do I have the patience to do so.  Fortunately, I recently discovered that supermarkets carry peeled, frozen pearl onions  for lazy and clumsy cooks like myself.  I decided to finally give coq au vin a try, and it really wasn't any more difficult than any other braises.  Feeling a bit lame for my use of frozen pearl onions, I've even decided to use fresh onions the next time I make the dish; and the next time will be soon because coq au vin is about the tastiest thing you can possibly do with plain old chicken.  Like most things when it comes to cooking, coq au vin taught me that there are few things that are beyond the home cook's reach (except maybe pheasant, but that's a whole 'nother story).  The below recipe is a mish mash of coq au vin recipes from Cook's Illustrated and Molly Stevens' All About Braising

Coq au Vin

Ingredients:
  • 1 whole chicken, wings, legs, thighs, and breasts separated, giblets wing tips and back bone reserved 
  • salt and pepper
  • 1/4 lb bacon, chopped into 1/2 inch pieces
  • flour for dredging
  • 5 1/2 tbsp tbsp butter
  • 1 yellow onion, diced
  • 1 carrot, diced
  • 1 tbsp tomato paste
  • 2 tbsp brandy
  • 1 bottle dry red wine, such as Beaujolais Villages
  • 2 garlic cloves, minced
  • 1 bay leaf
  • 1 tbsp thyme leaves
  • 4 tbsp parsley leaves, chopped
  • 1 cup chicken stock
  • 10 oz frozen pearl onions (or blanched and peeled)
  • 3/4 lb cremini mushrooms, cleaned, stemmed and quartered
Directions:
  1. Heat the oven to 325F. 
  2. Wash the chicken pieces and thoroughly dry them with paper towels.  Season them with salt and pepper and set aside.
  3. Place the bacon in a large Dutch oven and cook it over medium-high heat, stirring occasionally, until it is browned on the outside but not completely crispy.  Remove the bacon with a slotted spoon and set it aside on a plate.
  4. Dredge each chicken piece in flour, shaking off the excess.  
  5. Add 2 tbsp of butter to the bacon fat.  Once the butter has melted and has stopped foaming, add as many of the chicken pieces as will comfortably fit in the pan without overcrowding. Cook the chicken pieces until well browned on all sides, 4 to 5 minutes per side.  Remove the chicken to a plate and brown the remaining batches.
  6. Add another tbsp of butter to the Dutch oven and reduce the heat to medium.  Add the onion and carrot and cook, stirring occasionally, until the vegetables begin to brown, about 5 minutes.
  7. Add the tomato paste to the Dutch oven and stir well to so that it is well incorporated into the vegetables and fat. 
  8. Pour in the brandy and bring it to a boil. Scrape the bottom of the pan with a wooden spoon to stir up any brown bits.  Continue to boil until almost all of the liquid has evaporate, about 2 minutes.
  9. Add the wine, garlic, bay leaf, thyme, and 2 tbsp parsley to the Dutch oven.  Bring to a boil and cook until the wine is reduced by half, about 12 to 15 minutes.  
  10. Return the bacon to the pan and pour in the stock.  Bring the mixture to a boil, then reduce it to a simmer. Ladle out a half cup of the liquid into a cup for cooking the mushrooms and onions.  
  11. Add the chicken pieces, including the back, wing tips, and giblets, to the pan.  Add the pieces in layers.  
  12. Cover the Dutch oven and place it in the lower third of the oven. Braise it until the it is tender and cooked through, about an hour.  Flip the chicken pieces once or twice as they cook. 
  13. While the chicken braises, cook the onions and mushrooms.  Heat 1 tbsp butter in a large skillet over medium heat.  Add the onions  and cook, stirring occasionally, until they begin to brown, about 3 minutes.  Stir in the half cup of reserved braising liquid and reduce the heat to a simmer.  Cover the skillet and cook the onions, stirring them periodically, until they are tender, about 15 minutes.  Add 1 1/2 tbsp of butter to the pan and increase the heat to medium-high.  Once the butter stops foaming, add the mushrooms and season them with salt and pepper.  Cook the mushrooms and onions, stirring periodically, until they are browned and glazed with the braising liquid, about 10 minutes.  Remove them from the heat and set aside.
  14. Once the chicken is cooked, remove the chicken pieces from the Dutch oven and set them aside on a plate.  Discard the back, wing tips, and giblets.  
  15. Skim some of the fat from the braising liquid.  Bring the braising liquid to a boil and reduce it until it is slightly thickened, about 10 minutes.  Reduce the heat to a simmer. 
  16. Stir the onion and mushroom mixture into the braising liquid.  Let the liquid simmer for about 5 minutes to let the flavors meld.  Taste for salt and pepper.
  17. Spoon the braising liquid over the chicken pieces and garnish them with the remaining chopped parsley.  Serve immediately. 

Thursday, January 28, 2010

Chicken Noodle Soup for the Lazy Cook's Soul

Feverish, congested, and completely run-down the other night, I decided that it was a good time to give chicken noodle soup a try.  In no mood to spend time researching a recipe, I decided to wing it.  Following what I assumed to be the the basic process of chicken noodle soup recipe-- make a broth with chicken, vegetables, and herbs, then cook the noodles-- I surprised myself with how well it turned out.

Chicken Noodle Soup

Ingredients:
  • 2 tbsp olive oil
  • 2 carrots, peeled and finely chopped
  • 2 celery stalks, finely chopped
  • 1 onion, finely chopped
  • 2 garlic cloves, minced
  • 1/2 cup dry white wine
  • 2 bay leaves
  • 2 sprigs thyme
  • salt and pepper, to taste
  • 2 bone-in skinless chicken drumsticks
  • 2 bone-in skinless chicken thighs
  • 1/2 cup elbow-shaped pasta
Directions:
  1. Heat the oil in a soup pot over medium heat.  Add the carrots, celery stalks, and onion and cook, stirring occasionally, until the vegetables begin to soften but before they brown, about 5 minutes. 
  2. Add the wine to the pot and boil until it is completely reduced, about 5 minutes.
  3. Add the bay leaves, thyme, salt, pepper, and chicken to the pot.  Pour in enough water to cover the dry ingredients by 2 inches.  Bring the water to a boil, then reduce the heat to a gentle simmer.  Simmer for 25 minutes.  Remove the chicken pieces and cut the meat into small pieces.  Add the meat to the pan and discard the bones. 
  4. Increase the heat to a rapid simmer and add the pasta.  Cook until the pasta is cooked to your liking.  Taste the soup for salt and pepper.  Remove the thyme sprigs and bay leaves and serve immediately or refrigerate for up to 3 days. 

Monday, January 18, 2010

Sriracha Wings


There are still a few more weeks to go before the big game, but that doesn't mean it's too early to start thinking about your Super Bowl party.  Nothing goes better than wings and football, but who wants to taint their party and their game with any connotations of the football that was played up in Buffalo this year? These Sriracha wings, made with the popular Asian chile condiment instead of the traditional American hot sauce, are a welcome change.  The key to these wings, adapted from a Michael Symon recipe, is the lime, which gives the dish acidity and sweetness that balance out the heat of the Sriracha.  Best of all, this dish can easily be scaled up or down, making it a great finger food for any party, big or small.  

Sriracha Wings
Serves 5 (1 lb chicken wings per person)

Ingredients:
  • 5 lbs chicken wings, split ("Buffalo-style")
  • 2 tbsp ground coriander
  • 1/2 tsp ground cumin
  • 1/2 tsp ground cinnamon
  • 1 tbsp coarse salt
  • 2 tbsp olive oil
  • 6 tbsp Sriracha sauce
  • 6 tbsp butter, melted
  • 1/4 cup cilantro leaves, chopped
  • Grated zest and juice of 2 limes
  • Peanut oil, for frying
Directions:
  1. Put the wings in a large bowl.  Add the coriander, cumin, cinnamon, salt, and olive oil and stir well to coat the wings.  Cover the bowl with plastic wrap and refrigerate overnight.
  2. In a small bowl, combine the Sriracha sauce, cilantro, melted butter, and lime zest and juice.  Set aside.
  3. Preheat the oven to 375F. Place the wings on two baking sheets, making sure that each wing has 1/2 an inch or so of space.  Roast the wings for 30 minutes.
  4. Meanwhile, add pour enough of the peanut oil into a deep saucepan so that it reaches 1/3 of the way up the sides.  Heat the oil to 375F.
  5. After roasting the wings, add no more than half to the frying pan, using your judgment to make sure that the oil does not rise above the top of the pan and that the oil does not cool down too much once you add the wings.  Fry the wings for 5 minutes, then remove them to a large bowl.  Fry the remaining wings.
  6. As the second batch of wings is cooking, add the Sriracha mixture to the bowl containing the fried wings.  Toss the wings well to coat each wing with the sauce.  Remove the wings to a plate, reserving the leftover sauce which will be used for the remaining wings.  Once the second batch of wings is done, toss them in the sauce.  Serve the wings immediately with plenty of cold beer.

Monday, December 21, 2009

Thomas Keller's Ad Hoc Fried Chicken

I may not have found much time to blog the last few weeks, but that didn’t stop me from caving into a recent fried chicken craving. It must have been all of the praise on the blogosphere for Thomas Keller’s buttermilk fried chicken recipe from his latest cookbook, Ad Hoc at Home, for I just could not resist making a mess of my kitchen and giving Chef Keller’s recipe a spin of my own. The mess I created and the calories I ingested were well worth it, as the fried chicken was easily the best fried chicken I have ever had. The recipe can be found all over the Internet at this point (here’s one place to find it), so I won’t type it up again, but it is worth expanding on exactly what makes Thomas Keller’s fried chicken so perfect. What I love about his recipes, as complicated and precise as they may be, is that every ingredient and every step serve a clear purpose. There are three keys to his fried chicken recipe that make it the crispiest and most succulent fried chicken I have ever tasted:
  • The Brine: Have you ever wondered why restaurant chicken and pork is so much more juicy and so much more flavorful than what you cook at home, even when you purchase the best locally-produced, pasture-raised, all-organic, massaged-by-Cretan-virgins meat you can find? It’s not because the cooks have some magic up their sleeves. Often, it’s the restaurant is using a simple flavoring technique that you can just as easily use at home: brining. By soaking the meat in a brine for 12 hours prior to cooking it, the muscle cells will absorb the liquid of the brine via osmosis. In non-scientific words, a brine makes for supremely juicy meat. Keller does one better by adding lemon halves, thyme, parsley, garlic, and honey to the brine; the chicken soaks up all of those flavors making Keller’s fried chicken reach that pinnacle of fried birds where the meat is as delicious as the crust.
  • The Crust: To ensure an exceptionally crispy and flavorful crust, Keller instructs us to dredge the chicken in two layers of seasoned flour (with buttermilk between the two layers). The key to this technique is to make sure that you shake off the excess coating so that the crust on the chicken is crispy but not too thick. Keller spikes his flour with paprika, cayenne, garlic powder, and onion powder, which all lend the crust a nice bite.
  • The Buttermilk Coating: Like many fried chicken recipes, Keller’s calls for coating the chicken pieces in buttermilk. Although the chicken has already been brined, the buttermilk coating acts almost as a second brine, sealing in all of the chicken’s juices to ensure that very little moisture escapes as it is cooked.

What I love about Thomas Keller’s recipes, as complicated and precise as they may be, is that every ingredient and every step serve a clear purpose. The Ad Hoc at Home recipe may take more time and effort to make than your average fried chicken, but in carrying it out, you will perfect the three pillars that produce the ultimate fried chicken.

Sunday, November 8, 2009

Braised Chicken Thighs with Mushrooms and Bacon


By now, it should be no secret that braising is my favorite cooking method. Aside from the obvious attractiveness of braising (makes delicious leftovers, uses inexpensive cuts of meat, etc.), I love braising because I am comfortable and confident enough with it that I do not need to use a recipe to come up with a flavorful dish. As long as you follow the basic formula of browning the meat, sauteing the aromatics, deglazing the pan, adding the braising liquid, and cooking until the meat is tender, you are virtually guaranteed a nice meal.

All I did with for the below recipe was to follow the aforementioned technique using the ingredients that I had on hand. Braising really is that easy. These braised chicken thighs have a wonderfully rich and earthy sauce thanks to the mushrooms and bacon. Serve them over polenta to soak up the liquid.

Braised Chicken Thighs with Mushrooms and Bacon
Serves 4

Ingredients:
  • 8 bone-in chicken thighs
  • Salt and pepper
  • 3 slices bacon, chopped
  • 1 medium yellow onion, finely chopped
  • 10 oz. button mushrooms, thinly sliced
  • 3 garlic cloves, minced
  • 1/2 cup dry white wine or vermouth
  • 1/2 cup chicken stock
  • 1/4 cup chopped parsley
Directions:
  1. Season the chicken thighs with salt and pepper. Set aside.
  2. In a deep skillet over medium heat, saute the bacon until beginning to brown, about 5 minutes. Remove the bacon with a slotted spoon and drain on a paper towel-lined plate.
  3. Add the chicken thighs to the skillet, careful not to crowd them. If necessary, cook in two batches. Cook the chicken thighs until well browned, 3 to 5 minutes per side. Set chicken aside on a plate.
  4. Pour off all but 2 tablespoons of fat from the pan. Add onions, garlic, and mushrooms to skillet. Cook, stirring occasionally, until the mushrooms begin to brown and have released their moisture, about 10 minutes.
  5. Pour the wine into the skillet and bring to a boil. Stirring up any brown bits that have stuck to the bottom of a pan with a wooden spoon, reduce the wine by half, about 4 minutes.
  6. Add the stock to the pan and bring to a boil. Reduce to a simmer and add the chicken thighs. Cover and cook until the chicken is cooked through, approximately twenty minutes, turning once. Remove the chicken to a warmed plate.
  7. If the sauce needs to be thickened, bring it to a boil and cook until it reaches a desired consistency. Stir in the parsley and season it with salt and pepper. Serve the chicken thighs with the braising liquid.

Thursday, June 25, 2009

Kung Pao Chicken

To me, Kung Pao chicken is Chinese comfort food. It's one of those guilty pleasures that I find myself frequently making a batch of on Thursday nights when I have little desire desire to cook after a long week of work.

For my latest dose of Kung Pao chicken, I improvised quite a bit based on the ingredients I had on hand. I adapted a recipe from Fuchsia Dunlop, substituting shallots for the a few garlic cloves and adding a healthy dose of spinach. Although it was not quite the real deal, it was completely delicious. For authentic Kung Pao chicken, just omit the spinach addition and shallot-for-garlic substitution.

Eddie's Kung Pao Chicken
Serves 4

Ingredients:
  • 1/2 tsp cornstarch
  • 1 tbsp Shaoxing wine
  • 2 lbs. chicken breasts (or thighs), cut into bite-size pieces
  • 3 tbsp. peanut oil
  • 6 dried chiles
  • 1 shallot, minced
  • 1 inch piece of ginger, minced
  • 1 tsp. sugar
  • 3 tbsp. soy sauce
  • 1 tsp. sesame oil
  • 1 large handful of spinach
  • 1 handful of unsalted roasted peanuts, chopped
  • 1 scallion, thinly sliced

Directions:
  1. Mix cornstarch with wine in a large bowl and whisk until cornstarch dissolves. Add chicken to bowl and mix well to coat pieces with cornstarch mixture.
  2. Add oil to wok or large skillet and heat over high heat. Add dried chiles to pan and cook until they are blackened and fragrant, about 5 minutes.
  3. Add shallots and ginger to pan and cook until fragrant, about 1 minute.
  4. Add chicken to wok and cook, stirring constantly, until chicken is cooked through, about 5 minutes.
  5. Reduce heat to low. Add sugar and soy sauce and mix well. Simmer until sauce has thickened slightly, about five minutes.
  6. Add spinach and stir until wilted, about two minutes.
  7. Remove pan from heat. Mix in peanuts, scallion, and sesame oil and serve.

Wednesday, June 10, 2009

The Greenmarket Challenge: Day 3

Rather than supplementing my Greenmarket purchases with purchases from the supermarket as I usually do, I bough all of my purchases from the Greenmarket this week. I set myself a budget of $110, which is only slightly more than what I normally spend for two weeks of groceries. Keep in mind that this budget will cover my breakfasts, lunches, and dinner for the next 12 days; that's $11 a day, a fair budget considering my average lunch in midtown Manhattan is $8. I have allowed myself some leg room to use ingredients such as grains, sauces, and garlic that I already had on hand, but other than that necessary allowance, my entire diet for the week will consist of local foods. Follow along with me as I document local my meals over the next twelve days of my Greenmarket Challenge.

Day 3

Breakfast: Whole wheat toast with Tonjes Farm Dairy ricotta, Cherry Lane Farm strawberries, and local honey

Lunch: Pasta salad with Eckerton Farm sugar snap peas and spring garlic pesto

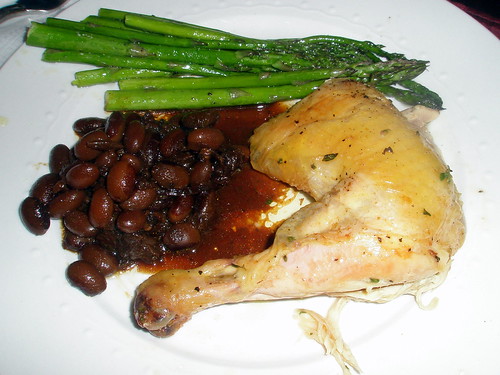
Dinner: Roasted Grazin' Angus Acres chicken with Cherry Lane asparagus and leftover Rancho Gordo baked beans


The $21 chicken was by far the biggest splurge on my Greenmarket Challenge, but I could not resist purchasing it since all of my other purchases from Grazin' Angus (eggs, flap steak, ground beef) have been superb. How was the chicken? Well, it didn't taste like foie gras, which one might expect from a $21 chicken, but it was pretty darn good. I roasted it using the minimalistic (and Greenmarket Challenge rule-abiding) Thomas Keller method. It turned out perfectly, with succulent meat and a crispy skin. Not to say the chicken was worth $21 dollars (no chicken is worth $21), but I did feel great for supporting a great local farm in Grazin' Angus Acres.

Saturday, May 23, 2009

Chicken Thighs with Panko and Parmesan Crust


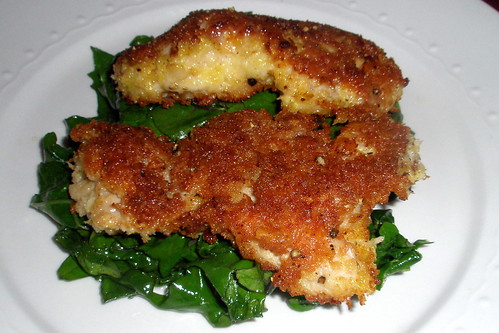
A recent article in The New York Times about the universal popularity of Huy Fong brand sriracha sauce had me considering what is the most versatile ingredient in my kitchen. While my spice rack is full of items I find indispensable, and finding myself without garlic or onions has been the source of many last-minute trips to the grocery store, panko would be my answer to the "if you were on a desert island and had to cook a gourmet meal" question.  A well-cooked meal is about texture and taste, and panko provides both of those elements.  If on that dessert island, find a sizable local varmint, coat it in panko, then fry it up.  In the comforts of a studio apartment, chicken or scallops are nice substitutes.  For this dinner, I breaded some chicken thighs in panko supplemented with parmesan cheese.  I served it over some delicious--and not the least bit bitter-- swiss chard from Eckerton Hill Farms.

Chicken Thighs with Panko and Parmesan Crust

Ingredients:
  • 1 tbsp. butter
  • 1 2 tbsp olive oil
  • 1 lb. chicken boneless, skinless chicken thighs
  • 2 eggs, beaten
  • 1/2 cup panko
  • 1/2 cup parmesan cheese, grated
  • salt and pepper
  • lemon wedges, for serving
Directions:
  1. Heat butter and oil over medium-heat in a large skillet.
  2. Meanwhile, mix panko and cheese on a large plate.
  3. Season chicken thighs with salt and pepper. Note: the cheese is salty, so only a few pinches of salt are necessary.
  4. Dip chicken each chicken thigh into eggs, then panko and cheese mixture. Shake off excess panko.
  5. Add chicken thighs to skillet and cook, about 4 minutes per side.
  6. Serve with lemon wedges.

Tuesday, April 7, 2009

Chicken Cacciatore


I do love my no-fuss recipes, especially on work nights. As the story goes, hunters would make cacciatore ("hunter-style") chicken with the ingredients they carried along on their hunts. The story may be far-fetched, but this really is an easy dish to cook. Serve it over plenty of polenta to soak of the braising liquid.

Chicken Cacciatore
Serves 4

Ingredients:
  • 3 lbs. chicken drumsticks and thighs, washed and thoroughly dried
  • Salt and pepper
  • 2 Tb olive oil
  • 1 medium yellow onion, thinly sliced
  • 4 cloves garlic, minced
  • 3 carrots, peeled and sliced into 1/4 inch pieces
  • Large handful of shiitake mushrooms, sliced
  • 1 tsp. juniper berries, crushed
  • 1 cup dry white wine
  • 1 cup canned tomatoes with juice, chopped

Directions:
  1. Heat olive oil over med-high heat in a deep skillet.
  2. Season chicken with salt and pepper. Add to skillet, skin side down. Do not crowd; if necessary brown chicken in two batches. Cook chicken until well browned, about 5 min. per side. Remove to plate.
  3. Discard all but 1 Tb of fat in skillet. Reduce heat to medium and add onion, garlic, carrots, mushrooms, and juniper berries. Cook, stirring occasionally, until vegetables soften, about 8 minutes.
  4. Add wine to skillet and let come to a boil, increasing heat if necessary. Boil for a minute.
  5. Add tomatoes to pan, and stir to mix liquids. Add chicken to pan reduce heat to low; bring to a simmer and partially cover skillet. Simmer until chicken is cooked through, about 25 minutes, turning chicken mid way through cooking.


Tuesday, March 24, 2009

Chicken Adobado

Tonight's dinner was Chicken Adobado from Molly Stevens' All About Braising. It's so simple: your marinade about 10 chicken thighs marinated for an hour in a mixture of a half cup each of water and white vinegar, zest from two limes, a large splash of soy sauce, two teaspoons of brown sugar, two bay leaves, and salt and pepper. Then you cook the chicken in a covered skillet for about 45 minutes, flipping the thighs occasionally. Finally, you brown the chicken in a second skillet while reducing the braising liquid in the original skillet. You add the chicken back to the sauce and serve it over rice with a simple salsa of chopped tomato, chopped onion, lime juice, and cilantro. My camera battery died, so the only evidence of the deliciousness that ensued is this iPhone photo:


Thursday, March 12, 2009

Arroz con Pollo

Pimentón must be the most often reached for spice on my spice rack. Nearly any mundane dish, from chickpeas to chicken breasts, can be instantly improved with a healthy dose of pimentón. Of course, this smoked paprika is most at home in Spanish dishes; this one reason for my undying love for Spanish cuisine. The other night, I made arroz con pollo. The below recipe is adapted from one that appears in Penelope Casas' The Food & Wines of Spain. My rice was slightly more moist than it should have been due to my use of canned tomatoes (fresh tomatoes in NYC in November, fugghedabbout it) and a fairly fatty chicken (should have drained some of the fat), but the flavor was dead on, thanks to the pimentón, of course.


Arroz con Pollo
Serves 4

Ingredients:
  • 1 chicken, cut into pieces
  • 6 Tb olive oil
  • 2 green peppers, chopped
  • 2 small yellow onions, chopped
  • 3 garlic cloves, minced
  • 2 canned tomatoes, drained and chopped
  • 2 piquillo peppers, drained and chopped
  • 1 Tb hot pimentón
  • 1/4 tsp. saffron
  • 2 cups bomba rice
  • 3 1/2 cups homemade chicken broth
  • 1/2 cup white wine
  • salt and pepper, to taste
  • Minced parsely, for garnish
Directions:
  1. Preheat oven to 325F
  2. Salt chicken pieces
  3. Add olive oil to a large skillet (or paella pan, if you have it) and heat over med-high
  4. Add chicken to pan and cook until nicely browned, about 7 min. per side. Remove chicken to plate and set aside.
  5. Add green peppers, onions, and garlic to pan. Cook until peppers have softened, about 6 min. Reduce heat if necessary so that vegetables do not brown.
  6. Add tomato and piquillo peppers to pan and cook about 5 min.
  7. Add paprika, pimentón, and rice to pan. Stir to coat rice with oil.
  8. Pour in broth and wine. Add salt and pepper and bring to a boil. Cook until rice has absorbed most of the liquid, about ten min.
  9. Place chicken pieces over rice and place skillet in oven. Cook for 15 min.
  10. Remove pan from oven and let sit, covered, for 10 min.
  11. Garnish with parsley and serve.

Thursday, March 5, 2009

Roasted Chicken with Salsa Verde from A16: Food + Wine

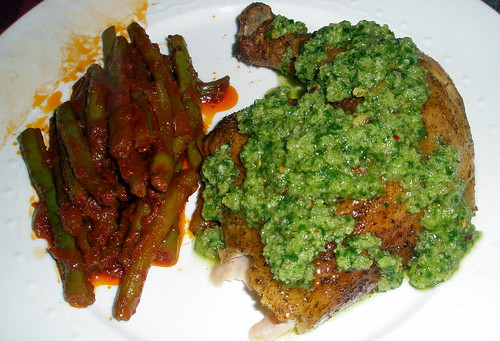
To me, a new cookbook is like a new toy to child; shortly after buying one, I just can't stop playing with it. In the case of A16: Food + Wine, I have a new toy that I don't think I will ever grow bored of. I've already sung my praises for this cookbook, but I would like to report on yet another excellent dish that I cooked from it: Roasted Chicken with Salsa Verde.

The recipe is actually for tiny roasted young chickens, but I had picked up a nice 3lb. Giannone chicken, so used that instead. I also ran out of dried oregano so I substituted dried sage for some of the oregano that the recipe called for. The chicken still turned out beautifully: a wonderfully crispy skin, juicy and flavorful meat. The salsa verde is excellent as well; my girlfriend who abhors parsely gave it her approval, so don't be alarmed by the cup of parsley that goes into the sauce.

There are two keys to this dish. First, spend a little extra to get a quality bird; chicken quality makes an especially big difference when it comes to simply roasted chicken. Second, the chicken benefits greatly from the two day seasoning process. Planning a recipe two days in advance can be a hassle, but after two days, the seasoning permeates the meat nicely. As an added bonus, this process allows you to just toss the chicken in the oven when you are ready to cook it rather than taking the time to wash, dry, and season the chicken first.


Roasted Chicken with Salsa Verde


For the Chicken:
  • 1 good-quality 3lb. chicken, washed and thoroughly dried
  • 3 Tb kosher salt (yes, 3; don't be shy)
  • 1 1/2 Tb dried oregano
  • 1 1/2 Tb dried sage
  • 1/2 ts dried chile flakes

For the Salsa Verde:
  • 1cup flat leaf parsley
  • 1/2 ts dried chile flakes
  • 1/2 ts capers, drained
  • 1/2 cup fresh breadcrumbs
  • 1/2 cup extra virgin olive oil
  • 1/2 of a lemon
  • small clove of garlic (or 1/2 of a large clove)
  • pinch of salt

Directions:
  1. Two days prior to cooking, grind oregano, sage, and chile flakes in a spice grinder. Rub chicken skin and cavity with salt. Then, rub spice mixture on skin and in cavity. Cover and refrigerate for two days.
  2. Cook chicken at 450F until cooked through, about 50 minutes. Meanwhile, make the salsa verde.
  3. For salsa verde, add parsley, breadcrumbs, chile flakes, capers, and garlic to food processor. Pulse until well blended. While running processor, drizzle in olive oil. Add lemon juice and pinch of salt and process to blend.
  4. Once chicken is cooked, let it rest for 10 min. Serve with salsa verde.


Wednesday, June 25, 2008

Roast Chicken

Roast Chicken

June 25, 2008 · 1 Comment

For tonight’s dinner, I had roast chicken with leftover curried Christmas limas and sauteed kale. I’ll ignore the boring side dishes, and just focus on the chicken.

While there are countless techniques for roasting a chicken, the one thing to remember about roast chicken is that butter and salt are your best friends. A great roast chicken shouldn’t be diet food. I’ve found that more salt = crispier skin and more butter = moist meat. The other seasonings can vary, but don’t skimp on butter or salt.

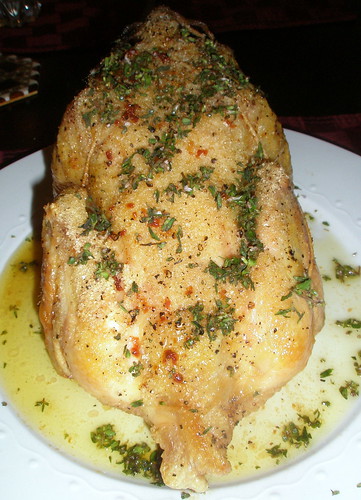
I used a tiny 2 lb. chicken from Knoll Crest Farm that I bought at the Greenmarket this past weekend. Immediately when I came home from work, I pulled the chicken out of the fridge, washed it, and dried it thoroughly with paper towels. I then set the chicken aside on a platter and preheated the oven to 375 degrees.

Next, I went through my fridge and pantry to see how I would season the chicken. I pulled up some thyme and some garlic. A lemon would have been great, but alas, I did not have any lemon, so I made due with the thyme and garlic. I chopped up about a quarter cup of thyme leaves, minced two cloves of garlic, and threw the two into a bowel. I also set aside a few sprigs of thyme and two crushed garlic cloves.

I then pulled out the butter. I sliced off a healthy 1/4 stick and threw it into the bowl with the garlic and thyme. I then added a large dashes of salt and pepper to the bowl. I mixed the garlic, butter, thyme and s&p with my hands to make a thick paste. I rubbed the paste all over the chicken, sticking a few sizable chunks under the skin of the breast. Finally, I poured a waterfall of salt (yes, more salt) over the chicken. If you think you’ve poured on a lot of salt, keep pouring another second. Here’s how it all looked before I stuck it in the oven:

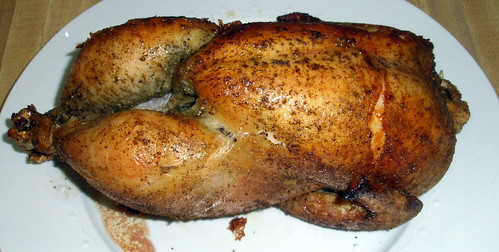
I assumed my small chicken would take no more than 45 minutes to cook in the 375 degree oven. However, after 45 minutes, the temperature on my thermometer read 150 degrees and the skin was not very brown. I pumped the oven up to 450 and stuck the chicken in for another 7 minutes or so, when the thermometer read 160 and the skin had browned slightly. I set the chicken on a platter for ten minutes. Meanwhile, I added a splash of white vinegar to the pan I had roasted the chicken in and stirred up all the browned bits at the pan. This step not only cleaned my skillet nicely, but it also made a nice pan sauce for my chicken. I poured the sauce over the resting chicken. The result was a tasty, non-diet roast chicken.

LinkWithin

Related Posts with Thumbnails