Showing posts with label Asian. Show all posts

Sunday, February 27, 2011

The Final Countdown begins with Pho


 I recently received the exciting news that I will be leaving New York in six months to become a full-time student for the next two years in a place that is a very far cry from New York.  While I am ecstatic to begin this new chapter in my life, I am going to be sad to leave behind all the people, places, and activities that have made my five years in New York so special, so like a person who's been told he has six months to live (and for me, the thought of enduring two years of cafeteria food and microwave dinners feels a bit like that), I have created a list of things to do before I leave this great city.  While my list includes a lot of special, only in New York activities (picnic in Central Park, run around the island of Manhattan), it also includes a category of items that most New Yorkers would not dare do: "Challenging Foods to Cook!"  In six months, I'll not only to be kitchen-less, but I'll also have limited time to do much cooking, so I have decided to try to make an effort all those foods that I have always wanted to make, but never made the time or the effort to cook.

First up on my cooking list was pho, the Vietnamese soup.  After making it, I realized that making pho is not at all the challenge I assumed it would be, although after about four hours of preparing it plus a couple more hours wandering the streets of Chinatown in search of the right ingredients, a $5 bowl at a pho joint seems like an even better deal.  I made pho bo, or beef pho, using thin slices of cooked brisket and raw sirloin, but the technique for pho ga (chicken pho) is fairly similar.


The first step to a great pho is to char the skins of the onions and ginger that go into the broth.  If you don't have a hood or a well-ventilated kitchen, it's best to do this step under a broiler or outside on a grill.  If you do, or you don't like me, but know you will be moving out of your apartment in six months, you can roast the vegetables over an open flame.  You want to char the ginger and onions completely, about 15 minutes, turning them frequently as they roast.  Once they are done, let them cool down.  Rinse the vegetables under cool water, peeling off the charred skins.


The central component of pho broth is, of course, the beef bones.  I used about 5 pounds of 2-inch thick shin bones. The first thing you'll want to do is to boil the bones in water for a few minutes, which will remove some of the impurities from the bones, allowing for a clearer broth.  Once boiled, drain the bones.


To make the broth, you combine the beef bones, the onions and ginger, a cinnamon stick, a spoonful each of cloves, star anise, sugar, and salt, a generous pour of fish sauce, and thick strips of brisket with six quarts of water.  Allow this mixture to simmer for an hour and a half.  Then, remove the brisket and continue simmering the broth for another hour and a half.  Drain the broth through a fine mesh sieve and refrigerate it overnight so that the fat solidifies.  The following day, remove the fat from the broth.


The day that you plan to serve the pho, prepare all of the condiments and set them on the table.  Lime juice, Thai basil, mint, blanched bean sprouts, Sriracha sauce, and hoisin are all go nicely with pho.

Once the broth is ready, prepare the bowls: boiled rice noodles, scallions, cilantro, thinly slice onions, thinly sliced cooked brisket, and thinly sliced raw sirloin.  Then pour the hot broth on top of it all.  It's perfection in a bowl.


Thursday, January 20, 2011

Red Curry Snapper Soup


I love a traditional Southeast Asian curry made with coconut milk and served over plenty of Jasmine rice.  But if you want to lighten it up and make something that is just as flavorful, you can make curry soup by using pretty much the same ingredients, but subbing out the coconut milk with water, just like I have done here using my recipe for red curry paste.  While I find the curry flavors complement seafood, curries made with coconut milk tend to overpower the fish, so I used the opportunity to make a curry soup with a whole red snapper that I marinated in lime juice.  Although the dish has a soupy consistency, it is best served over a bed of steamed Jasmine rice to sop up all the liquid.


Red Curry Snapper Soup
Serves 4

For the curry paste:
  • 1 tsp cumin seed
  • 1 tbsp coriander seed (use another teaspoon if not using coriander root)
  • 1 tsp white peppercorns
  • 5 dried Thai chilies, seeded and soaked in warm water
  • 1 tsp salt
  • 5 small shallots, thinly sliced
  • 10 garlic cloves, peeled
  • 1 tsp galangal, thinly sliced
  • 1 tbsp lemongrass, thinly sliced
  • 1 tbsp Kaffir lime rind, thinly sliced (discard the green peel and use the white pith)
  • 2 tsp coriander root, finely chopped
  • 1 tsp shrimp paste  
  1. Toast the cumin, coriander seeds, and peppercorns in a dry skillet over medium heat until they are fragrant and begin to pop.  Place them in a mortar and pound them with a pestle until they are finely ground.  Remove the spices from the mortar and set them aside.
  2. Add the dried chilies and salt to the mortar.  Pound the chilies to a paste.
  3. Add the shallots, garlic, galangal, lemongrass, lime rind, and coriander root to the mortar.  Pound the ingredients with the pestle until they form a paste.  
  4. Return the ground spice to the mortar along with the shrimp paste and use the pestle to mix the paste together. 
  5. Set three tablespoons of the curry paste aside for the curry.  The remaining paste can be frozen for up to 6 months. 
For the soup:
  • 1 whole red snapper, cleaned and cut crosswise into 2-inch pieces
  • juice of 2 limes
  • 3 tbsp peanut oil
  • 1 batch curry paste, see above
  • 8 kaffir lime leaves
  • 1 1/2 cup water
  • salt, to taste
  • palm sugar, to taste
  • leaves from 1 bunch of Thai basil
  1. Place the snapper in a nonreactive bowl.  Toss it well with the lime juice and allow it to marinate for 30 minutes.
  2. Heat the olive oil in a large pot over medium heat.  Add the curry paste and cook, stirring frequently so that it does not burn.  Cook until the curry paste is deeply fragrant, about 5 minutes.
  3. Add the snapper, its marinade, the lime leaves, and the water to the pot.  Bring to a gentle simmer and cook, flipping the snapper pieces occasionally, until the fish is cooked through, about 10 minutes.
  4. Add the Thai basil and taste the soup for salt and palm sugar.  Serve immediately.

Tuesday, December 14, 2010

Ground Pork with Shrimp Paste and Lemongrass


I'll be the first to admit that shrimp paste isn't for the squeamish.  Pungent—and not in a good way—and pasty, for lack of a better word, the ingredient made of ground fermented shrimp might scare away even the most adventurous foodies.  However, as any lover of Southeast Asian cuisine is aware, shrimp paste makes pretty much everything taste better.  Just take Thai curry or papaya salad: yup, you guessed it, shrimp paste is an active player in their deliciousness.  As much as I try, I can't quite live off of curry and papaya salad, so I'm always looking for new ways to use up some of the jar of shrimp paste in my fridge. This pork recipe, loosely adapted from Andrea Nguyen's Into the Vietnamese Kitchen, was one of those attempts.  Typical of most Southeast Asian dishes, this one plays off of a contrast of flavors, with sweet, salty, and spicy well represented.  I still have half a jar of shrimp paste left, but I suspect I'll be purchasing more in no time.


Ground Pork with Shrimp Paste and Lemongrass
Serves 4

Ingredients:
3 tbsp peanut oil
3 dried Thai chiles
4 cloves garlic, minced
3 lemongrass stalks, trimmed, cut in thirds, and pounded with the flat side of a knife
1/2 pound ground pork
12 shrimp, peeled, deveined, and minced
1 tbsp sugar
2 tbsp shrimp paste, diluted in 1/4 cup warm water
1 tsp sesame seeds
2 Kirby cucumbers, thinly sliced

Directions:
Heat the oil in a large skillet over medium-high heat.
Add the chiles to the skillet and cook, stirring occasionally until they are fragrant and blackened.
Add the garlic and lemongrass to the skillet and cook until the garlic is fragrant, about 1 minute.
Add the pork to the skillet.  Use the back of a wooden spoon to break the pork up as it cooks, and cook until the meat is no longer pink, about 3 minutes.
Stir in the shrimp, sugar, and shrimp paste and cook for about ten minutes, stirring occasionally, until the mixture caramelizes, turning a reddish brown.  If the pan dries out, add a tablespoon of water at a time.
Remove the mixture from the pan and serve immediately with rice, topped with sesame seeds and garnished with the cucumbers.

Wednesday, November 10, 2010

How Momofuku Stole My Million Dollar Idea with a Sausage


I recently came up with my million dollar New York City food cart idea. The plan was to make pork burgers in the style of laab, chock full of lemongrass and toasted rice powder. I knew it would be a surefire hit. I'd set up shop in midtown during the day, filling the stomachs of office workers for $7 dollars a pop for a laab burger and all the accompaniments.  At night, I would trek down to the East Village to let sloshed NYU students sober up over some laab burgers served in a more low-brow style with a sesame bun and can of Four Loko. Alas, this great idea came to an end as I was perusing the Momofuku cookbook.  It was there—page 176, to be exact—that I spotted Tien Ho's recipe for Lemongrass Pork Sausage. It sounded similar enough to my idea, but I knew that the toasted rice powder, my secret ingredient, would set my dish apart.  Then I read the blurb above the recipe, which stated that toasted rice powder would be a nice addition to the sausage.  That's right, Tien Ho and David Change had my idea before I'd even thought of it. Back to the drawing board it is.  As for the Momofuku Lemongrass Pork Sausage? Well, I think theirs is better than mine would have been anyway.

Sunday, September 26, 2010

Project Food Blog Challenge #2: The Classics

Many thanks to those who voted for my post for Challenge #1 of Foodbuzz's Project Food Blog!  Your votes got me to Challenge #2, "The Classics." The prompt for the second challenge reads:

How well can you tackle a classic dish from another culture? We're bypassing the French and Italian standards in favor of more challenging cuisines.

The competition for this challenge will be even tougher, so it's all the more important that everyone vote for their favorite posts.  Voting will commence at 9am EST on September 27.  You can vote for this post via my contestant profile.  Thanks in advance for your votes!

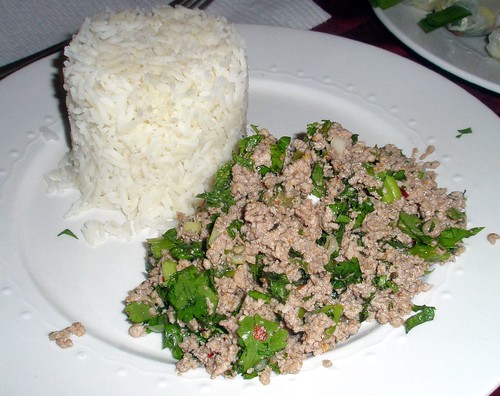
For the second challenge, I decided to make a traditional Thai red curry, not only because of the challenge the dish would present, but also because I had at least one major doubter in my ability to pull it off.  Those of you who regularly follow this blog are probably aware that the Significant Eater is of Laotian heritage.  Although she loves and reaps the benefits of much of my cooking, she is skeptical any time I try to cook the Southeast Asian cuisine that she grew up eating.  Although I have been successful in past efforts--Significant Eater had been particularly impressed with the authenticity of my larb--, pounding out a curry paste from scratch and making a great curry would at last calm her fears of seeing me in the kitchen with fish sauce and shrimp paste in hand.


My mission began in Chinatown at 
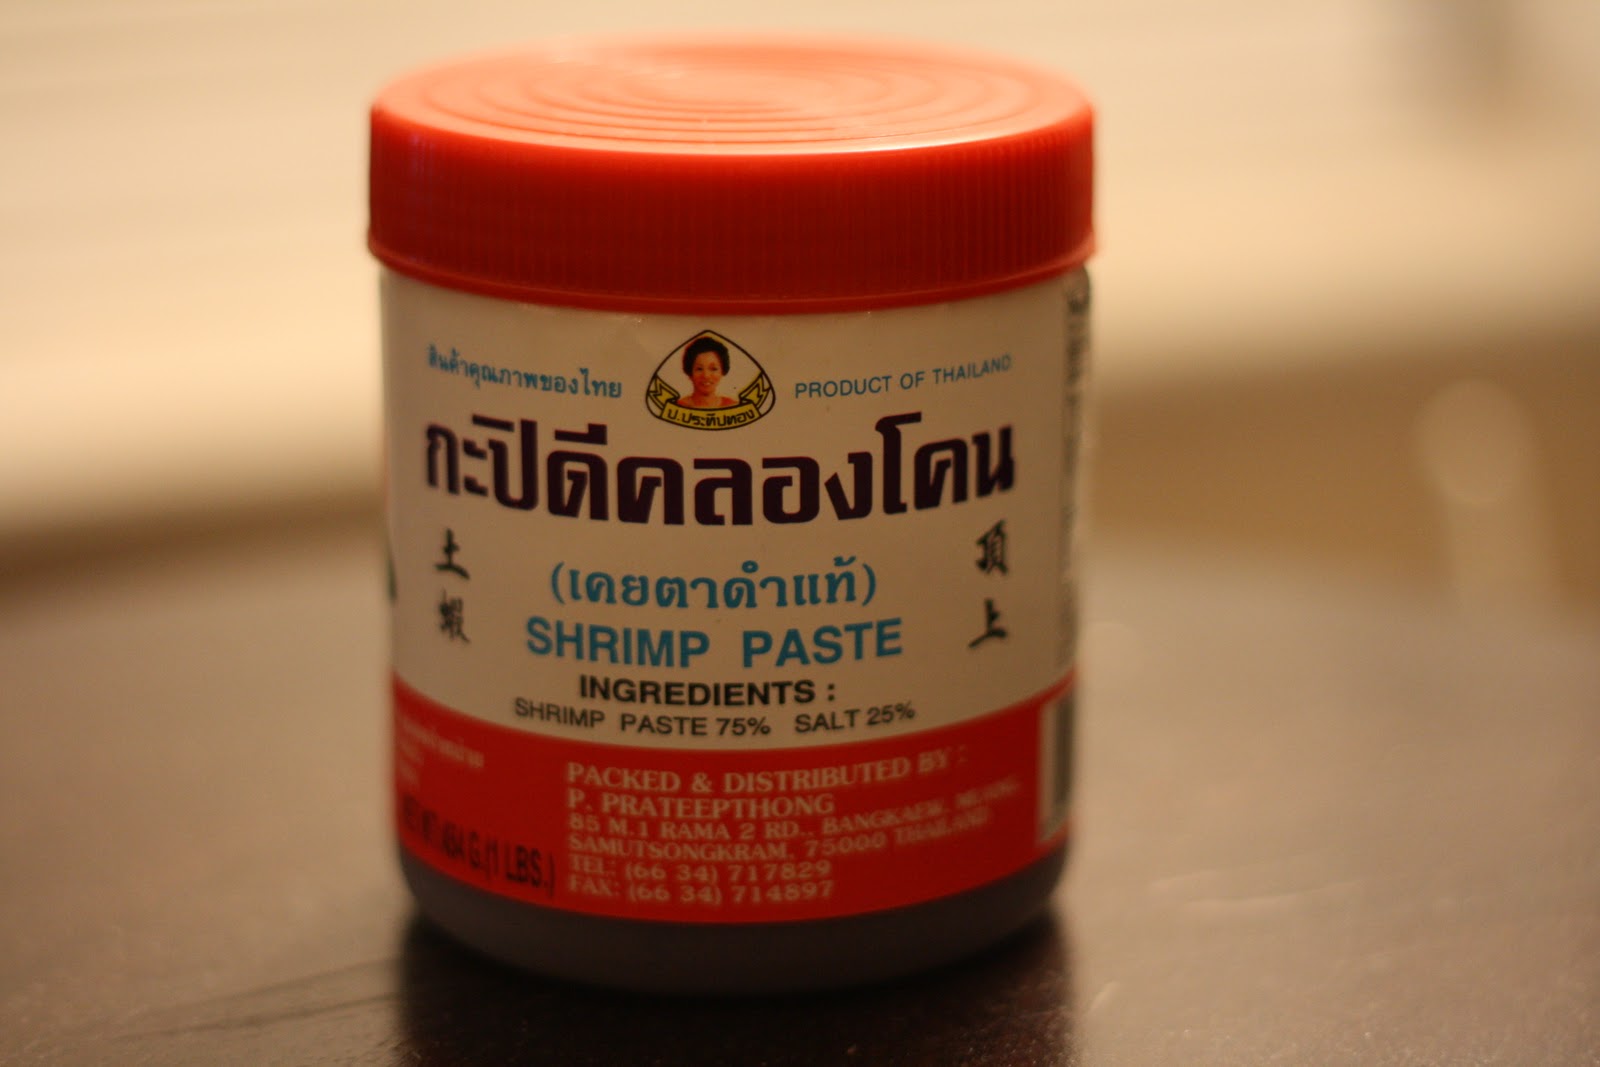
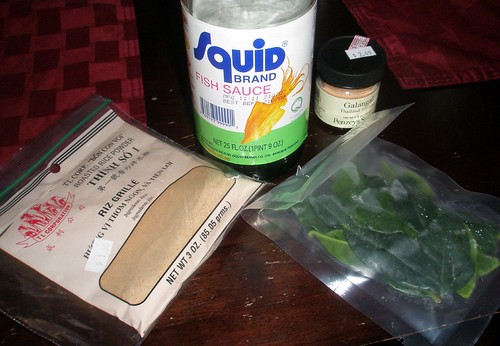
Bangkok Center Grocery, the best place in Manhattan to purchase Thai ingredients.  The friendly store clerk, who no doubt had the same misgivings as the Significant Eater when I told him I was making red curry, helped me find many of the ingredients that I would need to prepare the dish: galangal, lemongrass, coriander seed, white Kaffir limes and lime leaves, shrimp paste, bird's eye chilies, Thai basil, palm sugar, and coconut milk.  Unfortunately, the store had sold out of fresh coriander root, so I decided to double the amount of coriander seeds in the recipe and hope for the best (thankfully, it worked out).

 Most importantly, I also purchased a beautiful granite mortar and pestle that would help me pound out a perfectly textured curry paste. I picked up the vegetables I would need for the curry, long beans and Asian eggplant, from another Chinatown grocer, and was on my way home to start cooking.
 

The most challenging part of making a curry is preparing the curry paste.  Although it can be easily blended in a food processor, using a mortar and pestle will give the curry paste a better texture, and is also a much more Project Food Blog-worthy method.

The first step is to toast the spices (coriander, white peppercorns, and cumin seeds) in a dry skillet.  I toasted them until they were fragrant and beginning to crackle.  Once toasted, I tossed them into the mortar and pestle and began pounding away.


The Significant Eater chided me for my apparently weak mortar and pestle skills, letting me know that her 90-year-old grandmother not only makes curry paste faster than I, but also does so using a pestle that is twice as large as mine.  Once I got over my pestle envy, I rolled up my sleeves and began pounding away at the spices with more aggression.


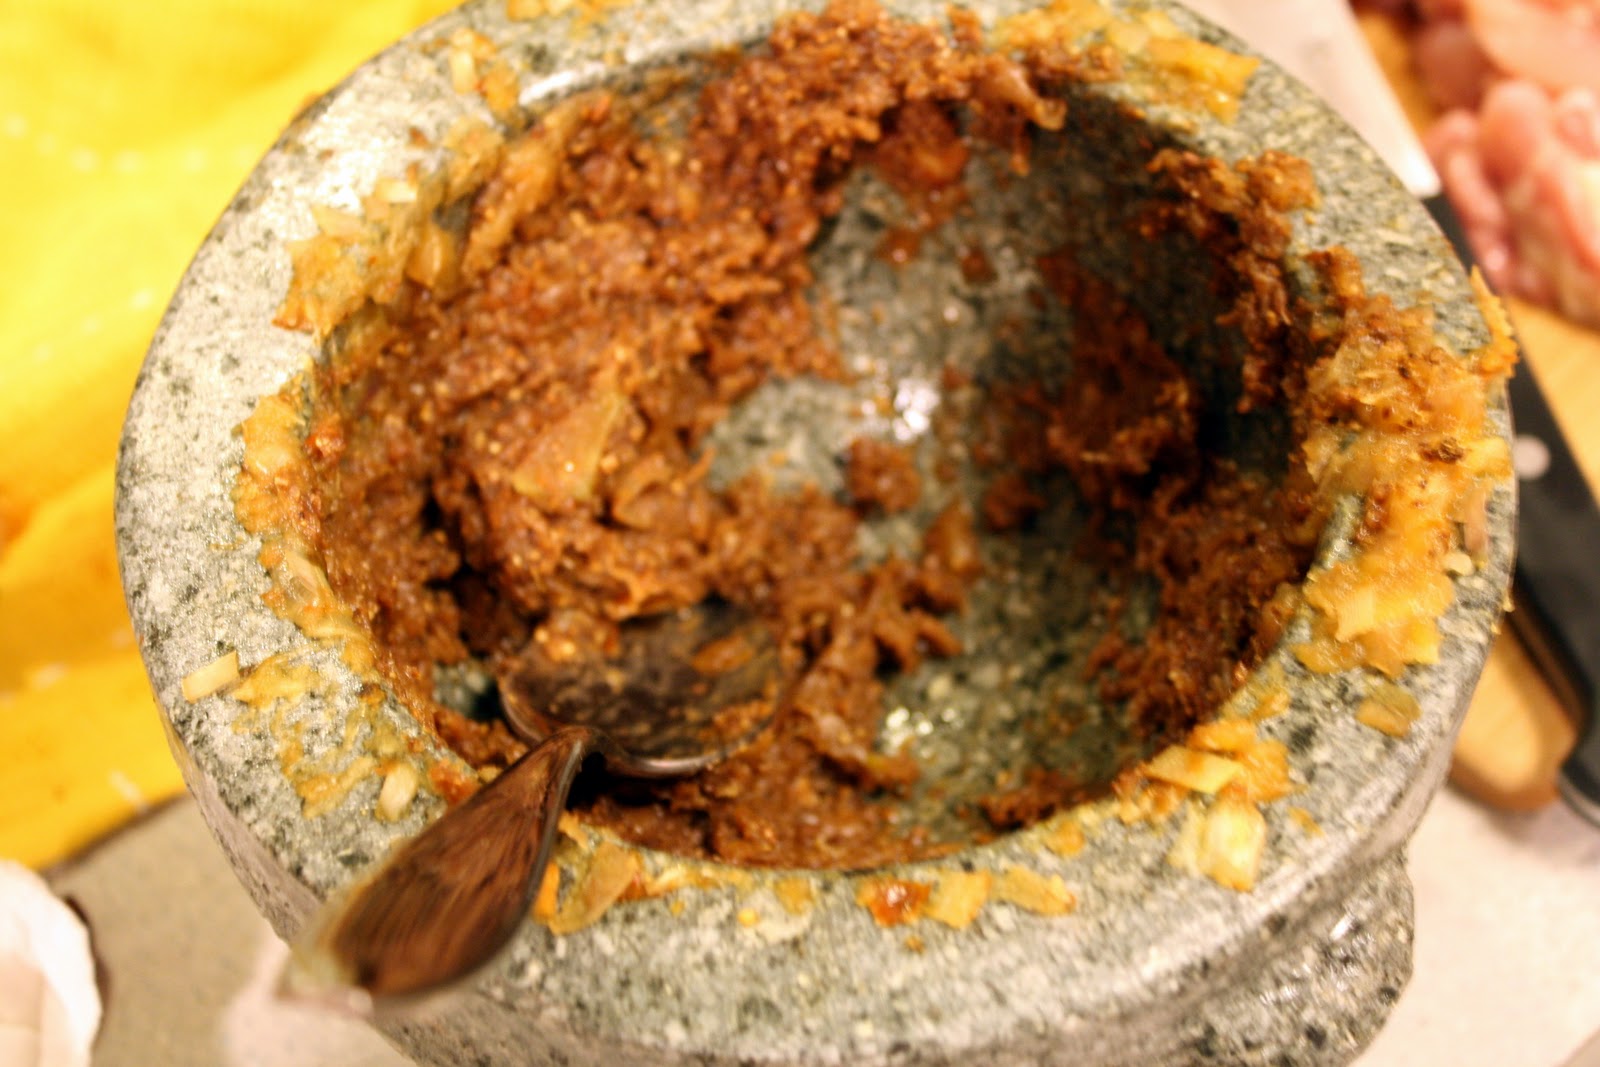
Once the spices were ground to a fine powder, I set them aside and placed the shallots, garlic, soaked dry chilies, salt, galangal, lemongrass, and Kaffir lime rind in the mortar and once again began pounding them with the pestle.  To say this step was labor-intensive is an understatement; it took over fifteen minutes, with a few breaks in between, before I was able to pound out all of the chunks in the paste. 


Finally, I added the ground spices and the extremely pungent shrimp paste to the mortar and mixed the paste together.  With a sore arm, I had finally completed the curry paste.  One thing is for sure: if I make curry paste a few times a week, I will no longer need to pay for a gym membership. 

And another thing that's for sure is that curry paste sure ain't the prettiest.


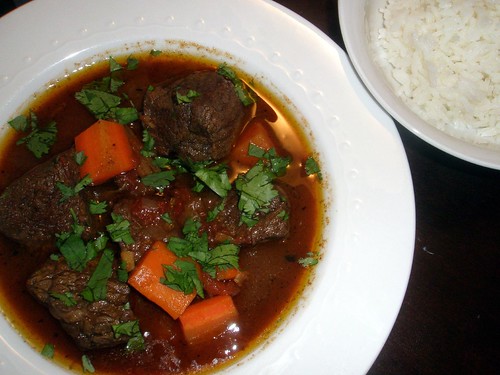
Fortunately, once I had prepared the curry paste, the rest of the curry was fairly easy to make.  First, I fried some of the paste in a bit of peanut oil until it was fragrant.  Then, I tossed in the chicken and stir fried it until it was cooked through.  Once done, I added in about half a can of coconut milk along with the long beans and chopped Kaffir lime leaves, and let it all simmer away for several minutes.  I then added the fish sauce, palm sugar, and eggplant and kept everything simmering until the eggplant was soft.  Finally, I tossed in the Thai basil.  The curry was ready!


I was a bit concerned that the curry was not as red in color as I expected it to be, but it certainly smelled and tasted like a Thai curry.  Of course, the only opinion that mattered was that of the Significant Eater herself.  I watched her with great trepidation as she spooned a small amount of the curry onto her plate and took her first bite.  Silently, she then proceeded to scoop out several more spoonfuls onto her plate.  Finally, she exclaimed, "Perfect!"

I have a feeling that she'll be allowing me to cook with my fish sauce and shrimp paste more frequently from now on.


Red Curry Chicken ("gang phet" in Lao)
Serves 4

For the curry paste:
  • 1 tsp cumin seed
  • 1 tbsp coriander seed (use another teaspoon if not using coriander root)
  • 1 tsp white peppercorns
  • 5 dried Thai chilies, seeded and soaked in warm water
  • 1 tsp salt
  • 5 small shallots, thinly sliced
  • 10 garlic cloves, peeled
  • 1 tsp galangal, thinly sliced
  • 1 tbsp lemongrass, thinly sliced
  • 1 tbsp Kaffir lime rind, thinly sliced (discard the green peel and use the white pith)
  • 2 tsp coriander root, finely chopped
  • 1 tsp shrimp paste 
  1. Toast the cumin, coriander seeds, and peppercorns in a dry skillet over medium heat until they are fragrant and begin to pop.  Place them in a mortar and pound them with a pestle until they are finely ground.  Remove the spices from the mortar and set them aside.
  2. Add the dried chilies and salt to the mortar.  Pound the chilies to a paste.
  3. Add the shallots, garlic, galangal, lemongrass, lime rind, and coriander root to the mortar.  Pound the ingredients with the pestle until they form a paste.  
  4. Return the ground spice to the mortar along with the shrimp paste and use the pestle to mix the paste together. 
  5. Set three tablespoons of the curry paste aside for the curry.  The remaining paste can be frozen for up to 6 months. 
For the curry:
  • 2 tbsp peanut oil
  • 3 tbsp curry paste
  • 1 lb. boneless, skinless chicken thighs, cut into bite-size pieces
  • 1 1/2 cups Chinese long beans, chopped into 1-inch pieces
  • 1/2 of a 13.5 oz. can of coconut milk
  • 1 1/2 tsp palm sugar
  • 2 tbsp fish sauce
  • 1 Asian eggplant, sliced into half-moon-shaped pieces
  • 2 fresh Thai chilies, thinly sliced
  • 1/2 cup fresh Thai basil leaves
  1. Heat the peanut oil in a large saute pan with high sides over medium-high heat. 
  2. Add the curry paste to the pan and cook, stirring constantly, until the paste is extremely fragrant, 3 to 5 minutes.
  3. Add the chicken to the pan and increase the heat to high.  Cook, stirring constantly, until the chicken is nearly cooked through, 3 to 5 minutes.  
  4. Reduce the heat to medium and add the coconut milk, long beans, and lime leaves to the pan.  Bring the coconut milk to a simmer, stirring frequently, until it thickens slightly, about 5 minutes.  
  5. Add the palm sugar, fish sauce, chilies, and eggplant to the pan.  Continue to simmer the curry until the eggplant is cooked through, about about 3 minutes.
  6. Taste the curry for seasoning.  If it needs salt, add a small amount of fish sauce.  If it is not sweet enough, add a small amount of palm sugar.  If it is not hot enough, add additional chilies.  
  7. Add the basil leaves to the curry and serve it with steamed Jasmine rice. 

Monday, September 13, 2010

Hunan Lamb Ribs


For those of you who have tried the famous cumin lamb at New York's Szechuan Gourmet, these lamb ribs will have some familiar flavors.  While the recipe is comes from Sichuan's neighboring province of Hunan, the intensity of the cumin, richness of the lamb, and spice from the chiles all give these ribs a delicious resemblance to what is in my mind one of the best dishes in all of New York. If you do end up making these ribs, just remember that lamb ribs aren't quite as easy to handle as pork ribs, so do your guests a favor and cut the meat off the bone before serving it.

Hunan Lamb Ribs
Adapted from Fuschia Dunlop's Revolutionary Chinese Cookbook 
Serves 2

Ingredients:
  • 2 slabs lamb ribs (about 2 lbs)
  • 4 tbsp Shaoxing wine
  • 2 cinnamon sticks
  • 1-inch piece fresh ginger, thinly sliced
  • 1 star anise
  • 5 dried Chinese chiles
  • 2 tbsp soy sauce
  • 2 tbsp sweet bean sauce
  • 1/4 tsp five-spice powder
  • salt
  • 6 scallions, green parts only, thinly sliced
  • 4 tbsp peanut oil
  • 1 tsp ground cumin
  • 1/2 tsp crushed red pepper flakes
  • 1 tsp sesame oil
Directions:
  1. Place the ribs in a large pot and cover with cold water.  Bring the water to a boil, then reduce the heat to a simmer.  Add 2 tbsp Shaoxing wine, 2 cinnamon sticks, the ginger, star anise, and dried chiles to the water and simmer the lamb for 5 minutes.  Drain the ribs and set them aside on a plate.
  2. Mix the soy sauce, bean sauce, 2 tbsp Shaoxing wine, five-spice powder, and a pinch of  in a small bowl.
  3. Massage the soy sauce mixture into the lamb ribs.
  4. Heat the peanut oil in a large skillet over high heat.  
  5. Add the ribs to the skillet and cook until well-browned on one side, about 3 minutes.  Flip the ribs and sprinkle the cumin and pepper flakes over the ribs.  Continue cooking until the other side is well-browned, 2 to 3 minutes. 
  6. Using a sharp knife, slice the meat off of the bones and set the meat on a plate.  
  7. Drizzle the sesame oil on top of lamb, garnish it with scallions, and serve immediately. 

Wednesday, May 12, 2010

Bacon Dashi with Mussels and Potatoes


"Man, you go through a lot of bacon!" Significant Eater exclaimed the other day as she watched me simmering half a pound of the good stuff to make the recipe for Bacon Dashi from Momofuku. 

"Don't worry, it's just a broth that contains the essence of bacon," I reassured her.  "I skim off all the bacon fat at the end, so it's actually not that bad for you.  Kind of like the idea behind Snackwells, but with much better flavor."

"Hmm, well that's a ton of bacon you have simmering.  Skim it well."

With the most persuasive tone I could muster, I said, "Don't worry.  And we're having mussels with it.  See? Healthy!"

"Wait... what's that?" She said skeptically.

"Just a little crispy bacon to top off the dish,"  I calmly answered.

She shrieked, "What! More bacon?"

"Oh yeah...sorry.  But trust me, it'll be worth it."

Tasting a mussel with a spoonful of broth, she said, "Wow...that's amazing."

"Bacon just makes everything better, doesn't it?"


Bacon Dashi with Mussels and Potatoes
Adapted from a recipe for Bacon Dashi with Clams and Potatoes from Momofuku

For the Bacon Dashi:
  • 2 sheets konbu (dried kelp, available at Japanese markets) 
  • 8 cups water
  • 1/2 lb smoky bacon
For the mussels:
  • 1 lb small fingerling potatoes, scrubbed
  • 2 lbs mussels, thoroughly scrubbed and debearded
  • 1/4 lb bacon, cut into 1-inch pieces
  • soy sauce, to taste
  • mirin, to taste
  • 1/4 cups scallion greens, thinly sliced
Make the dashi one day ahead of time to allow the fat to bacon solidify so it can easily be spooned off:
  1. Rinse the kelp under cold running water.  
  2. Place the kelp in a large pot with the water and bring it to a simmer.  Turn off the heat, and let the kelp steep for 10 minutes.  
  3. Remove the kelp from the pot and add the bacon.  Bring the water to a boil, then reduce the heat to a simmer.  Simmer for 30 minutes.  Remove the bacon and discard it.  
  4. Let the dashi come to room temparature, then chill it in the refrigerator.  Once the dashi is chilled, spoon off the layer of solidified fat that will have risen to the top of the liquid.  Proceed with the rest of the recipe.
To cook the potatoes and mussels:
  1. Cook the bacon in a large skillet over medium heat until it is crispy.  Remove the bacon with a slotted spoon and drain on it paper towels.
  2. Bring the dashi to a boil, then reduce the heat to a simmer.  Place the potatoes in the dashi and simmer them until they are fork tender, 15 to 20 minutes.  Remove the potatoes with a slotted spoon and reserve. 
  3. Bring the dashi to a boil and add the mussels. Cover the pot and cook until nearly all of the mussels are open, 8 to 10 minutes.  Remove the pot from the heat, and discard any mussels that do not open. 
  4. Add the potatoes to the dashi to heat them through.  Taste the dashi for seasoning.  If it needs salt, add a splash of soy sauce.  If it needs sweetness, add a splash of mirin. 
  5. Ladle the dashi into large bowls.  Place a few mussels and potatoes in each bowl and top each dish with the bacon and scallions.  Serve immediately. 

Thursday, February 11, 2010

Momofuku's Noodles with Ginger and Scallion Sauce


My latest Momofuku recreation, Ginger Scallion Sauce, is one of the easiest recipes in the book. Try it and you will understand why David Chang calls the sauce one of Momofuku's "mother sauces" that makes appearances in many of the restaurant empire's dishes.  The sauce will go with just about anything from meat to seafood to vegetables.  Replicating one of the dishes on the menu at Momofuku Noodle Bar, I served the sauce with soba noodles.  As Chang suggests, I topped the dish with the book's quick-pickled cucumbers (2 Kirby cukes tossed with 1 tbsp sugar and 1 tsp salt).  To make a complete meal of it, I also added pieces of sauteed chicken breast.  Served chilled, the dish would be an excellent dish for a picnic in the summer, but it was plenty tasty in the dead of winter.  

Ginger Scallions Sauce
Makes 3 cups

Ingredients:
  • 2 scallion bunches, white and green parts, thinly sliced
  • 1/2 cup ginger, minced
  • 1/4 cup grapeseed oil
  • 1 1/2 tsp usukichi (light soy sauce)
  • 3/4 tsp Sherry vinegar
  • 3/4 tsp kosher salt
Directions:
  1. Mix all ingredients together and let sit for 15 to 20 minutes.  Serve immediately or refrigerate for up to 2 days.   

Sunday, January 17, 2010

How to Make Momofuku's Pork Belly at Home


The Momofuku cookbook contains a number of ambitious recipes, but I began with what is just may be the simplest in this roast pork belly that makes appearances a few times in the book.  I had only made braised pork belly dishes prior to making this one, but I really like how the meat of the pork belly stays firm by roasting it.  The salt and sugar dry-brine lends a salty-sweet flavor that essentially turns the belly into a very meaty bacon.  I served the pork belly wrapped in lettuce with a pickled mustard seed dipping sauce, but it would be just as good served as a steamed bun filling, draped over steamed white rice, or thrown into a pot of ramen. 

Momofuku Roast Pork Belly
Adapted from Momofuku

Ingredients:
  • One 3 lb. slab skinless pork belly
  • 1/3 cup kosher salt
  • 1/3 cup sugar
Directions:
  1. In a large bowl, mix together the salt and sugar.  Rub this mixture all over the pork belly, discarding any excess.  Place the pork belly in a roasting pan that is large enough for the pork to fit snugly.  Wrap with plastic wrap and refrigerate overnight.
  2. Heat the oven to 450F.
  3. Remove the pork belly from the refrigerator.  Discard any liquid that has accumulated in the roasting pan.
  4. Roast the pork belly at 450F for one hour.  Halfway through cooking, baste the pork belly with the rendered fat.
  5. Reduce the oven to 250F and continue to cook for another 30 minutes.  Remove the pork belly from the oven and let it cool to room temperature.  Wrap the pork in plastic wrap and chill it in the refrigerator (this step will make it easier to cut in the pork belly into uniform pieces).
  6. Once the pork belly is chilled, remove it from the refrigerator.  Using a sharp knife, cut the pork belly into 1/2-inch-thick slices that are 2 inches in length.  
  7. Heat a large skillet over medium-high heat.
  8. Add the pork belly to the pan and heat each side just until the meat is hot, 1 to 2 minutes.  Serve immediately. 

Tuesday, October 20, 2009

Bo Kho Vietnamese Beef Stew

Bo kho, a traditional Vietnamese beef stew made with tomato, star anise, and lemongrass, from Andrea Nguyen's Into the Vietnamese Kitchen:

Tuesday, August 18, 2009

Larb: A Perfect Dish for Summer

Larb may be a dish from Northern Thailand and Laos, but I can't help but wonder if its creators invented the dish knowing that many years later, inhabitants of New York would need some refreshing and hearty dishes to get them through their hot summers. Simple to prepare and best at room temperature, larb, bursting with the refreshing flavors of lime, galangal, fish sauce, cilantro, and mint, really is a perfect dish for a hot summer night.

The most difficult part of making larb is purchasing the ingredients, which will definitely require a trip to a well-stocked Asian market, and preferably one that serves a Thai or Lao clientele. While you're there, buy fish sauce, galangal, lime leaves, and roasted rice powder. The good news is that you will get to make many more larbs before you need to return (store the lime leaves and the galangal in the freezer). I cheated and used some powdered galangal that I already had on hand:


The remaining ingredients can be purchased at any store: oil, ground pork, mint, cilantro, red pepper flakes, and lime juice. Cook the pork in a skillet, mix it in a bowl with the remaining ingredients, and serve it with jasmine or sticky rice, and some summer rolls. The below recipe is a simplified larb recipe adapted from Penn Hongthong's Simple Lao Cooking, but the Significant Eater, who grew up eating plenty of larb herself, proclaimed its flavors just as authentic as the real deal.


Larb Moo (Pork Larb)
Serves 4

Ingredients:
  • 1 lb. ground pork
  • 1 tbsp. peanut oil
  • juice from 1 lime
  • 1/2 tsp salt
  • 1 1/2 tbsp fish sauce
  • 1/2 tsp crushed red pepper
  • 1 tbsp galangal, minced, or 1 tsp ground galangal
  • 2 kaffir lime leaves, minced
  • 1 tbsp roasted rice powder
  • 1 tbsp lemongrass, minced
  • 2 scallions, minced
  • 1/2 cup cilantro, chopped
  • 1/2 cup mint, chopped
Directions:
  1. Heat oil in a wok over medium heat. Add pork and cook until no longer pink, 5 to 7 minutes.
  2. Set pork in a bowl and let cool for at least 10 minutes.
  3. Mix pork with remaining ingredients and serve with rice.

Monday, July 27, 2009

Sesame-Crusted Tuna Steaks


I always have somewhat of an ethical dilemma when I purchase tuna. It's over-fished, but it also happens to be one of my favorite seafoods. Unfortunately, there is really no substitute for the rich, meaty taste of a seared tuna steak, so I have chosen to continue to eat tuna, but only sparingly and only when confident that it has been line caught. This past Sunday, I could not resist purchasing tuna steaks from American Seafood at my local Greenmarket. Caught early that morning off the coast of Long Island, this was some well-sourced tuna that I felt a bit less guilty about enjoying.

I chose to encrust the tuna steaks in a mixture of sesame seeds and spices based on this recipe from Food & Wine magazine. I served the fish with roasted corn mayonnaise with kicked up with some sriracha sauce.


Sesame-Crusted Tuna Steaks

Serves 4

Ingredients:
  • 4 6-ounce tuna steaks
  • 4 tbsp. grapeseed oil
  • 1 tbsp. lime zest
  • 1 tsp. ground white pepper
  • 1 tsp. sweet paprika
  • 1 tsp. salt
  • 1 tbsp. grated ginger
  • 1/2 tsp . crushed red pepper
  • 3 tbsp. while sesame seeds
  • 3 tbsp. black sesame seeds
Directions:
  1. In a bowl combine all ingredients except for the oil and tuna.
  2. Brush tuna steaks on all sides with 2 tbsp. oil.
  3. Rub spice mixture over tuna steaks, patting them down to ensure that the spices adhere.
  4. Meanwhile, heat remaining oil in a large skillet over high heat until very hot.
  5. Add tuna to skillet and sear until just cooked on the outside and rare in the middle, no more than two minutes per side.
  6. Serve tuna with spicy mayonnaise and lime wedges.

Friday, July 10, 2009

Braised Soy Chicken with Thai Basil

For simple weeknight meals, I often turn to braised chicken dishes. They take very little time to prep and cook, tend to be friendly on the wallet, and provide me with plenty of leftovers to enjoy over the course of the week. Serve this Asian-style braised chicken with plenty of rice to soak up the braising liquid. If you can't find Thai basil, lemon juice would be another nice addition to the sauce.

Soy Braised Chicken with Thai Basil
Serves 4

Ingredients:
  • 2 lbs. chicken thighs and drumsticks
  • Salt
  • 3 tbsp. peanut oil
  • 8 cloves garlic, smashed with the side of a knife
  • 1 1-inch piece of ginger, peeled and minced
  • 1/3 cup Shaoxing wine (or dry sherry)
  • 1/4 cup soy sauce
  • 1 tbsp. double black soy sauce (a thicker, sweeter soy sauce)
  • 1 tbsp. sugar
  • 1/2 cup Thai basil, chiffonade

Directions:
  1. Lightly salt the chicken pieces.
  2. Heat the oil in a large, deep-sided skillet over medium-high heat.
  3. Add the chicken pieces to the skillet without crowding and cook until browned on both sides, about 5 minutes per side. If necessary, cook chicken in batches.
  4. Add garlic and ginger to skillet and cook until fragrant, about 1 minute.
  5. Add wine, soy sauces, and sugar to skillet. Boil, stirring constantly, for 5 minutes.
  6. Reduce heat to low and simmer until chicken is cooked through, about 5 minutes more. Remove from heat.
  7. Stir in Thai basil and serve.

Monday, June 22, 2009

Steamed Salmon with Garlic and Ginger

Despite my grand plans to cook a dinner celebrating the completion of my Greenmarket Challenge, after a particularly wild weekend of birthday parties, I was ready to detox come Sunday night. This salmon recipe, while on the healthy side, adapted from Andrea Nguyen's Into the Vietnamese Kitchen, is a winner. By steaming the salmon until it is barely cooked through, the fish stays moist. The sauce is just bold enough to not overpower the fish.


Steamed Salmon with Garlic and Ginger
Serves 4

Ingredients:
  • 4 6 oz. salmon fillets
  • 1 1/4 tsp sugar
  • Ground black pepper, to taste
  • 2 tbsp. oyster sauce
  • 2 tbsp. soy sauce
  • 2 tbsp. grapeseed oil
  • 3 cloves garlic, minced
  • 2-inch piece of ginger, peeled and minced
  • 3 scallions, thinly chopped

Directions:
  1. Mix the sugar, pepper, oyster sauce, and soy sauce in a small bowl. Stir until sugar has dissolved.
  2. Heat oil in a skillet over medium heat. Add garlic and ginger and cook until fragrant, about a minute. Add sauce mixture and bring to boil. Remove from heat and add scallions. Take sauce off heat and let come to room temperature.
  3. Fill a saute pan with deep sides half way with water. Bring to a boil.
  4. Place salmon fillets in a cake pan (or other pan with sides that is smaller in diameter than the saute pan), Top salmon with sauce mixture.
  5. Carefully place pan containing the salmon in the boiling water and cover. Let salmon steam until it flakes with a fork, approximately 7 to 9 minutes.
  6. Carefully remove salmon pan from water and serve salmon with the sauce.

Thursday, June 4, 2009

Pork Chops with Soy and Sriracha Pan Sauce

One of the first cooking techniques I learned was how to make a basic pan sauce: deglaze pan with alcohol, add liquid and seasonings, and reduce. Due to both the simplicity and versatility of pan sauces, they have become one of my standard go to's when cooking simple meals during the week. I have also found that a pan sauce lends itself well to improvisation; just about any tasteful combination of liquids and seasonings can make a great pan sauce as long as you follow the basic technique.

Tonight was one such pan sauce experiment that turned out nicely. The combination of soy sauce, sriracha, and hoisin rarely fails, so I decided to turn it into a pan sauce to accompany pork chops. I added garlic and ginger to season the sauce, and some sugar to slightly sweeten the sauce and to help it thicken. To keep with the Asian theme, I used shaoxing rice wine to deglaze the pan, but dry sherry would work just as well. The measurements are by no means exact, so add or subtract according to your taste; remember, a pan sauce lends itself to improvisation.

Pork Chops with Soy and Sriracha Pan Sauce
Serves 2

Ingredients:
  • 2 thick bone-in pork chops
  • Salt and pepper
  • 2 tbsp peanut oil
  • 1 large clove of garlic, minced
  • 1/2 inch piece of ginger, minced
  • 1/4 cup shaoxing (Chinese rice wine) or sherry
  • 1/4 cup soy sauce
  • 1 tbsp sriracha sauce
  • 1 tbsp hoisin sauce
  • 2 tsp sugar
Directions:
  1. Pat pork chops dry with paper towels. Season with salt and pepper.
  2. Heat oil in a deep skillet over medium-high heat.
  3. Add pork chops to pan. Cook for about two minutes per side. Reduce heat to low, cover skillet, and continue to cook pork chops until cooked through, about 3 more minutes per side. Remove chops from pan and let rest.
  4. Increase heat to medium. Add garlic and ginger to pan and cook until fragrant, about 1 minute.
  5. Add wine to pan and bring to a boil. Reduce by half, about 2 minutes. Reduce heat to low.
  6. Add soy sauce, hoisin, sriracha, and sugar to pan. Simmer until thickened, about two minutes.
  7. Serve pork chops over rice with pan sauce.

Thursday, April 16, 2009

Fatty Crab

I want you to imagine the following restaurant. The restaurant is in the West Village, as close as you can get to the Meatpacking District without technically being in the MPD. It's prone to very long waits to get a table at prime times. It's owned by a fairly well-known chef. This restaurant serves Asian cuisine, but neither the chef nor any of the staff are Asian.

So what are your assumptions of the above restaurant? If you are like me, you're thinking that the restaurant is surely an Asian fusion hell-hole serving expensive overly sweet dishes to hordes of tourists, bridge and tunnelers, and gossip girls who care only about the scene and nothing about the food.

Fatty Crab fits my description, but completely defied my assumptions. Instead, I found a restaurant serving authentically flavored dishes inspired by Malaysian street food at a decent price for such a popular restaurant in the West Village.

My girlfriend and I ordered dishes from each section of the menu, all under $15. From the "Snacks" section, we tried the Fatty Sliders, two intensely spiced pork and beef patties served on potato rolls with a cucumber and sambal aioli. While the dish itself may not be something you can find on the streets of Malaysia, the flavors were not dumbed down at all; the fish sauce, galangal, and coriander that flavored the meat was discernable.

From the "Salads" section of the menu, we ordered the watermelon pickle and crispy pork salad. For me, this was the overall winner of the night. The wonderful flavor combination of watermelon topped with pieces of crispy pork belly is definitely something I will try to recreate this summer for a picnic in Central Park.

We also ordered the Malay Fish Fry from the "Noodles/Soups/Rice" section. The nicely fried fish was served over rice in a spicy curry that went heavy on the fish sauce, a good thing in my book.

Finally, from the "Fatty's Specialies" portion of the menu, we tried the fatty duck, a steamed and fried duck served over toasted rice in a slightly sweet sauce. My girlfriend found the sauce to be too sweet, but I enjoyed it; the sauce was closer to a Vietnamese caramel sauce than to a gloppy Asian fusion sauce.

One of the main criticisms of Fatty Crab is with the pacing of the meal. The complaint is that dishes come at all times, in all orders, which is exactly what happened on my visit: the duck was served first, followed by the sliders, the watermelon salad, and finally came the fish fry. However, our helpful waiter informed us of the pacing and random order or courses prior to taking our order, so it did not catch us by surprise. The only surprise was in wondering what the next dish to arrive would be, which added a fun element to our dinner.

Of course, the best surprise was Fatty Crab itself. I was ready to write off the restaurant before I had even arrived, but after my one meal there, I will definitely return. I certainly was not expecting a decent value and delicious food, but that is exactly what Fatty Crab delivered.

Saturday, March 14, 2009

Shrimp in Spicy Tamarind Sauce


Tonight's dinner was from Andrea Nguyen's Into the Vietnamese Kitchen. The last time I made a sauce with tamarind pulp, it was cloyingly sweet, so I was reluctant to try it again. However, Nguyen's recipe for shrimp in tamarind sauce included sriracha and fish sauce, so I decided it might be worth the gamble to use up the tamarind pulp that had been sitting in my pantry. My decision paid off, as the dish was a nice balance of spicy, sour, and sweet. I served it with Nguyen's cabbage and egg stir-fry; the best I could do as an homage to St. Patrick.

I always appreciate a recipe where I learn a tip that I can carry with me. Nguyen suggests tossing the uncooked shrimp with a generous amount of salt and then immediately rinsing the salt off the shrimp prior to cooking. She says that this quick step will "return the flavor of the sea" to the shrimp. I can't believe I have never heard this before, as this pre-salting of the shrimp imparted a briny flavor, which really did remind me of the sea. This is a step that I will take whenever I cook shrimp, and I urge you to do so, too.

Friday, November 28, 2008

Bastardized Lemongrass Chicken

pb200006

Still trying to use up the rest of the Southeast Asian produce I bought at Whole Foods last week, I came across this simplified recipe for Lemongrass Chicken from Food and Wine. Although I prefer to cook authentic, unabridged meals when I choose ethnic recipes, after work, I do not have the time nor the physical and mental energy to cook anything more intricate than chopping some veggies and meat and throwing everything into a pan for a few minutes.

This recipe was slightly more difficult than my usual weekday dinners as I had to marinade the chicken (albeit for only 5 minutes) and make a caramel sauce before I was able to throw all the ingredients into a pan. In the end, it was a well-flavored dish, but the result was chicken thighs in a curry sauce, not lemongrass chicken. The curry powder in the sauce obscured the lemongrass and the caramel sauce, making even this simplified recipe seem unnecessarily complicated. By simply throwing garlic, shallots, oil, curry powder, water and chicken into a pan, I could have made an equally delicious dinner.

Tuesday, November 18, 2008

Spice Braised Nyonya Pork

Spice Braised Nyonya Pork

Towards the end of my trip to the Greenmarket this past Saturday, a rainstorm forced me to seek shelter in Whole Foods. Soaking wet with a backpack and totebag full of local goodies, a very non-local vegetable caught my eyes: fresh galangal from Hawaii. Fresh galangal? At Whole Foods? I thought that was something that was only found in Chinatown, and usually frozen at that. I knew that it was an omen, so I picked up a four inch piece of galangal along with a handful of fresh thai peppers (another “At Whole Foods?” moment for me).

When I returned home, I immediately pulled out the cookbook that I had in mind when I spotted the galangal: James Oseland’s Cradle of Flavor. The book is full of delicious recipes from the Spice Islands, but I do not get to cook from it very often since nearly every recipe requires a trip to Chinatown to pick out ingredients such as fresh turmeric, kaffir lime leaves, and, yes, galangal. This time, I at least had one ingredient on hand without having to treck down to Mott St.

The recipe I picked out was Spice Braised Nyonya Pork. Pork butt sauteed with galangal and a paste of shallots, then braised with water, sugar, double black soy sauce, rice vinegar, cinnamon, cloves, and star anise. All of this is reduced until the sauce just barely coats the meat. It ain’t local, but it sure was delicious!

LinkWithin

Related Posts with Thumbnails